Knowledge

Article Overview
Demo Product: C2P-EC-12B
Platform: Inovance Easy-523 PLC + AutoShop V4.11
Communication Protocol: EtherCAT
Configuration Process: New project → PLC communication connection → Import XML device file → Module configuration → Download → I/O address monitoring
Key Notes: Manual restart of AutoShop is required after XML file import; ensure all EtherCAT devices that need communication are enabled.
The Solidot C2P series valve island features dual RJ45 interfaces. Products supporting the EtherCAT protocol may need to be used with the AutoShop software. So how to complete the entire configuration and communication process from new project creation to XML file import, module configuration, program download, and I/O address monitoring?
The overall process can be divided into seven steps: create a new project and select the PLC model, establish PLC communication connection, import the XML device description file (AutoShop restart required after import), add modules via auto-scan or manual method and bind I/O variable addresses, download configuration and power cycle, confirm normal I/O address monitoring. This article uses the Inovance Easy-523 PLC + C2P-EC-12B as an example, explaining the key points of each step.
Safety Notes!!!
High Voltage Hazard Warning: Confirm the device is powered off before operation. Installation and wiring must be performed by qualified personnel.
Device Restart Warning: Confirm there are no safety hazards on site before power cycling to prevent accidental device start-up.
EtherCAT Communication Warning: Configuration errors may cause abnormal device operation; please verify in a test environment first.
I. Create a New Project
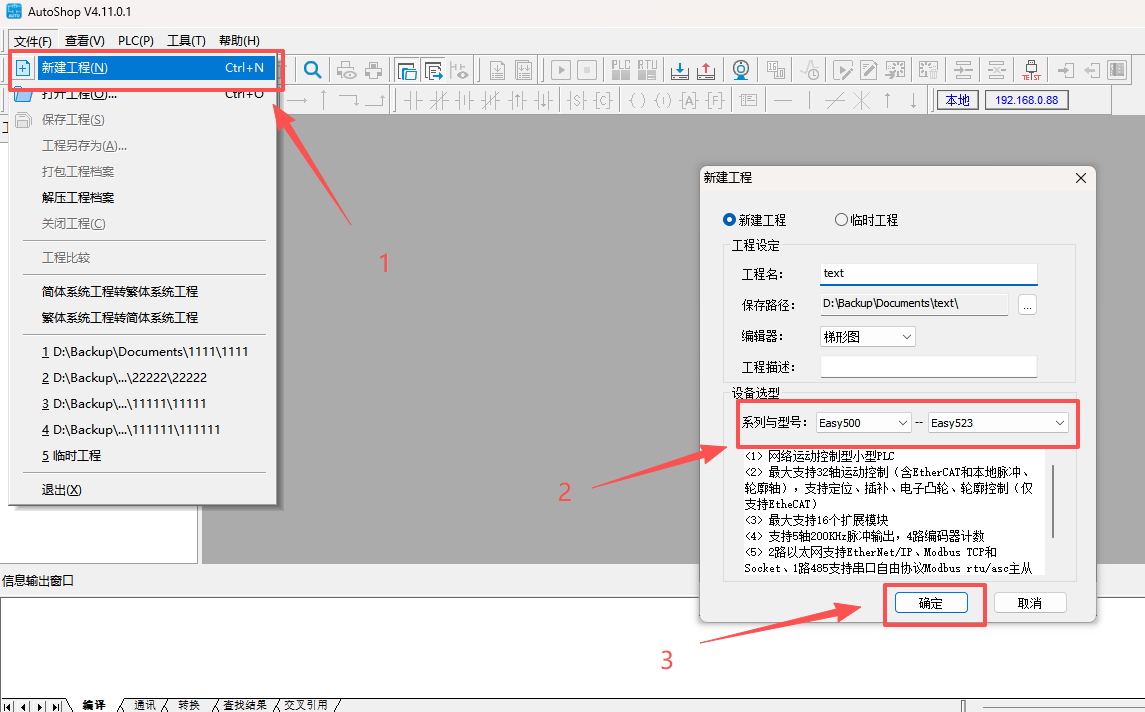
Create a new project in AutoShop and select the corresponding PLC model according to the actual hardware (Easy-523 in this example).
II. Establish PLC Communication Connection
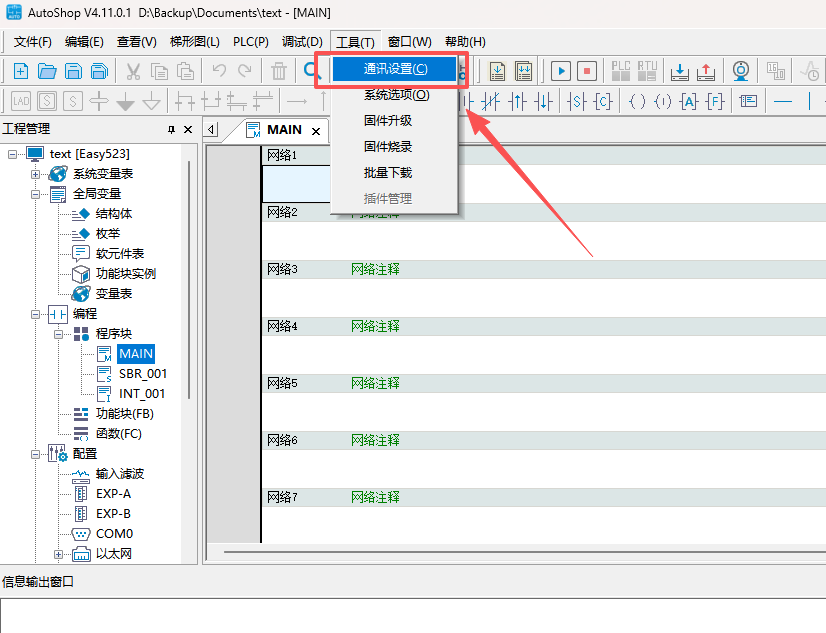
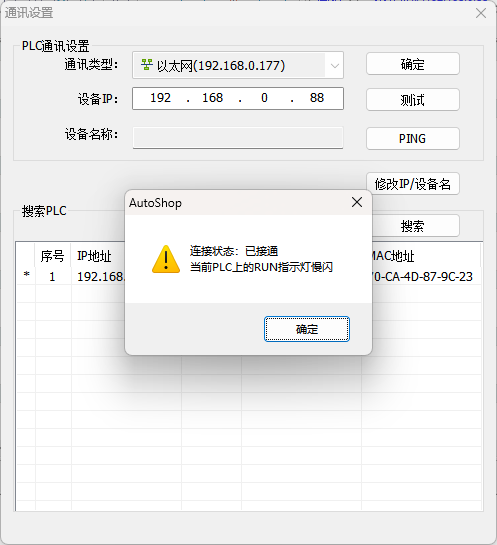
Click "Tools" → "Communication Configuration" on the menu bar, and establish a connection with the PLC in the communication configuration interface.
III. Import XML File
In the toolbox on the right, right-click "EtherCAT Devices" and select "Import Device XML". In the pop-up window, browse to the XML file location, select the corresponding file, and click "Open" to complete the import.
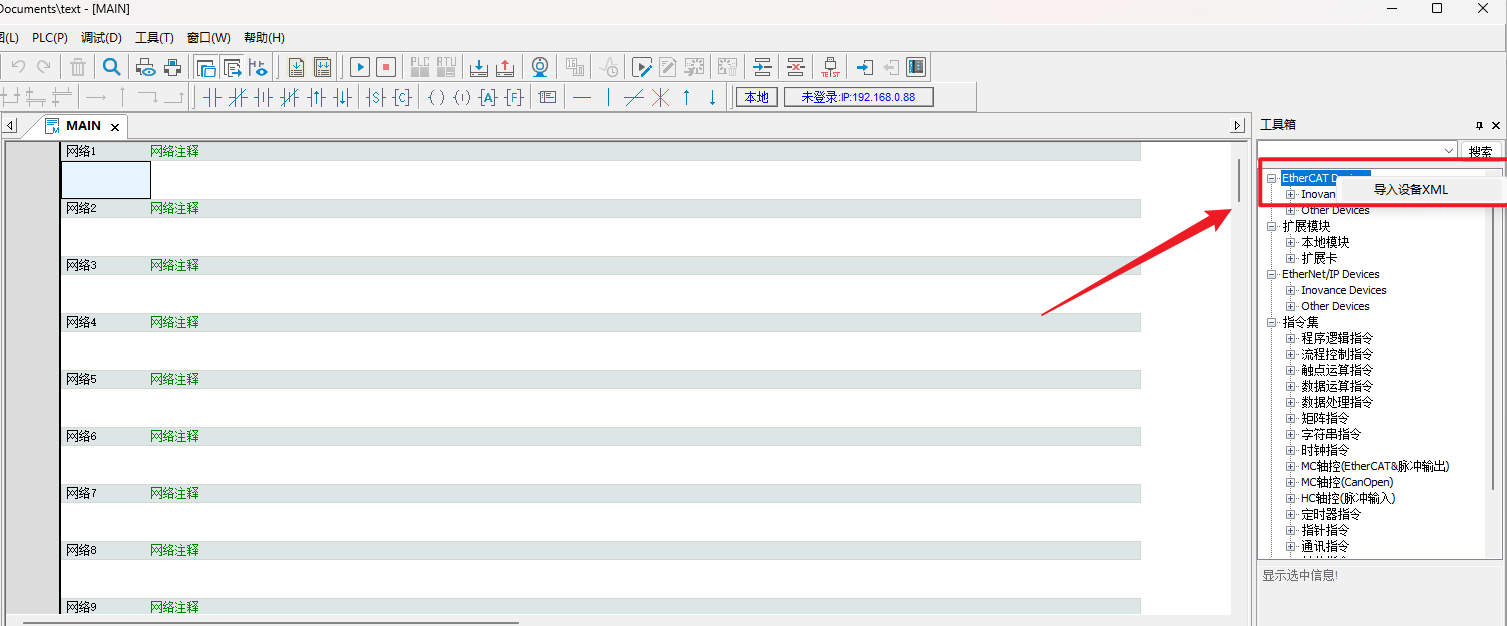
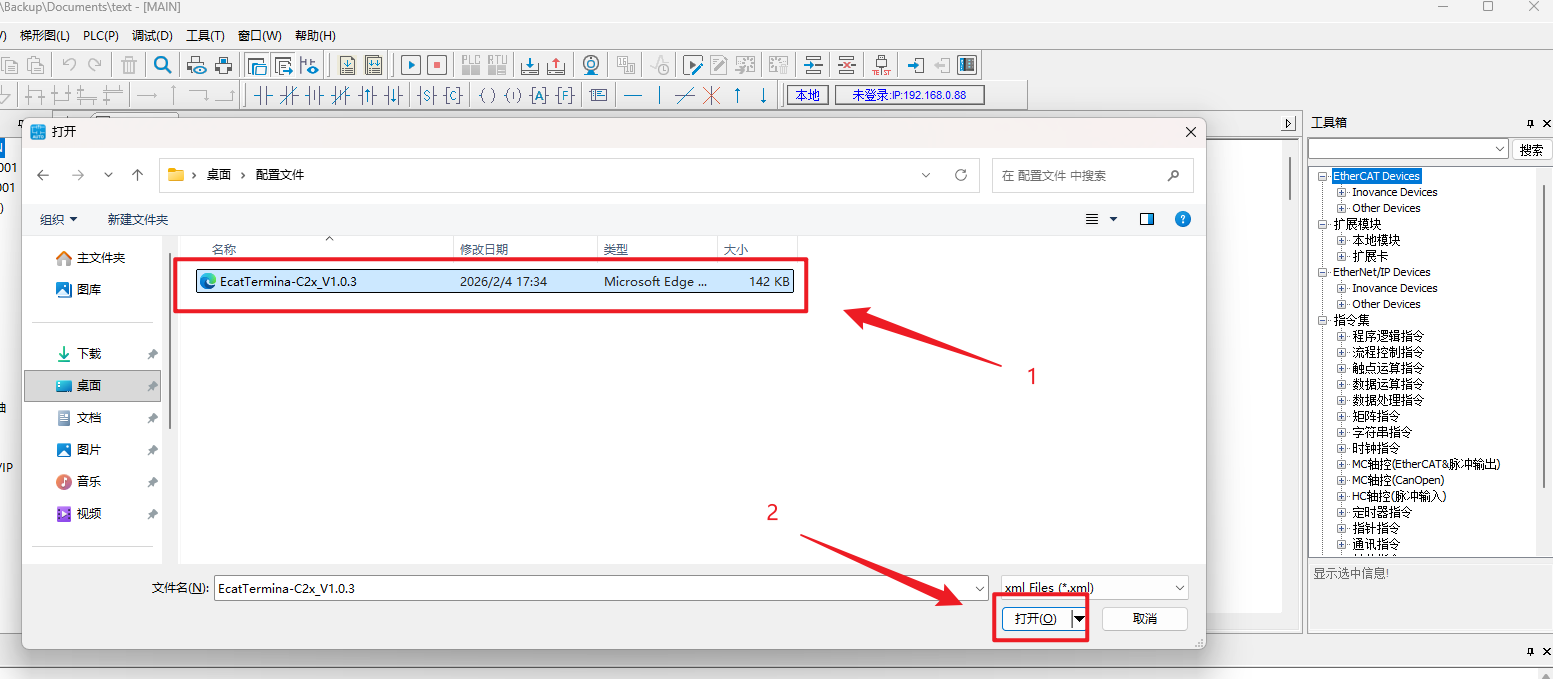
Note: After successful XML file import, manually restart AutoShop. The newly imported device can only be used for configuration after restart.
IV. Module Configuration
Method 1: Auto Scan (Recommended)
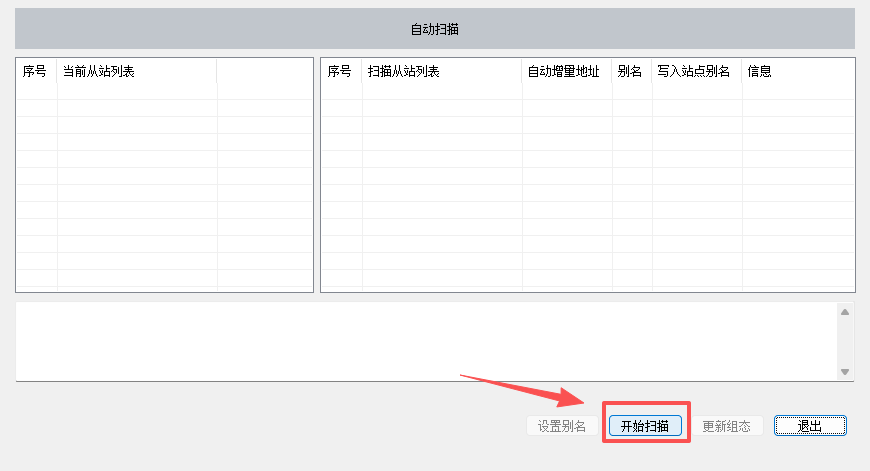
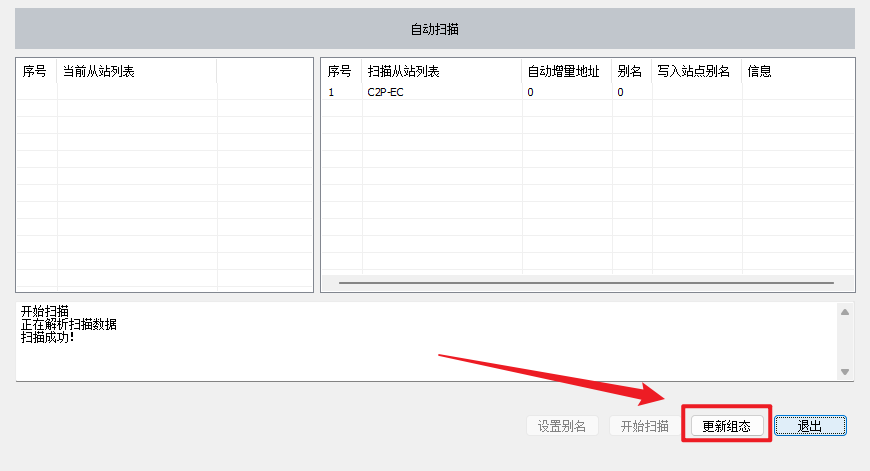
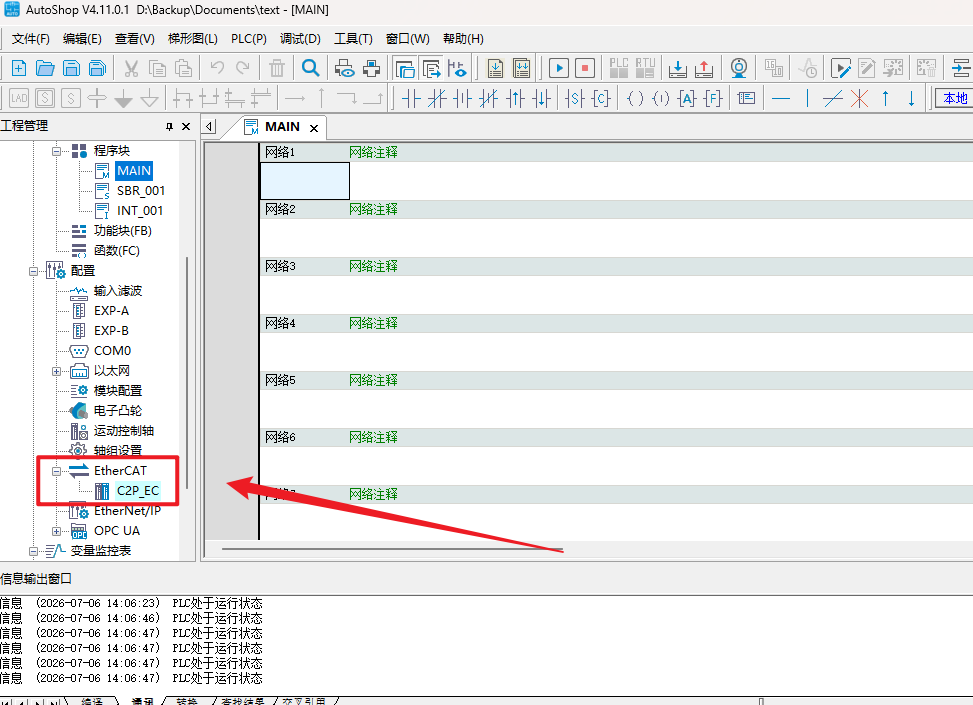
Right-click the "EtherCAT" icon and select "Auto Scan". In the scan window, click "Start Scan", confirm and wait for the scan to complete, then click "Update Configuration" to automatically add the modules connected in the network to the configuration.
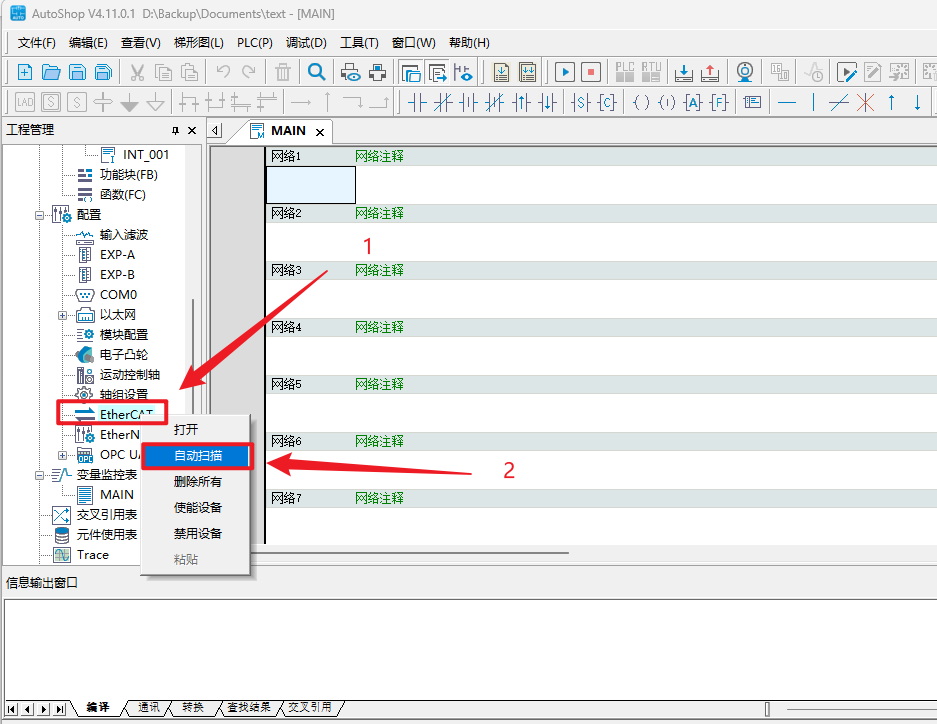
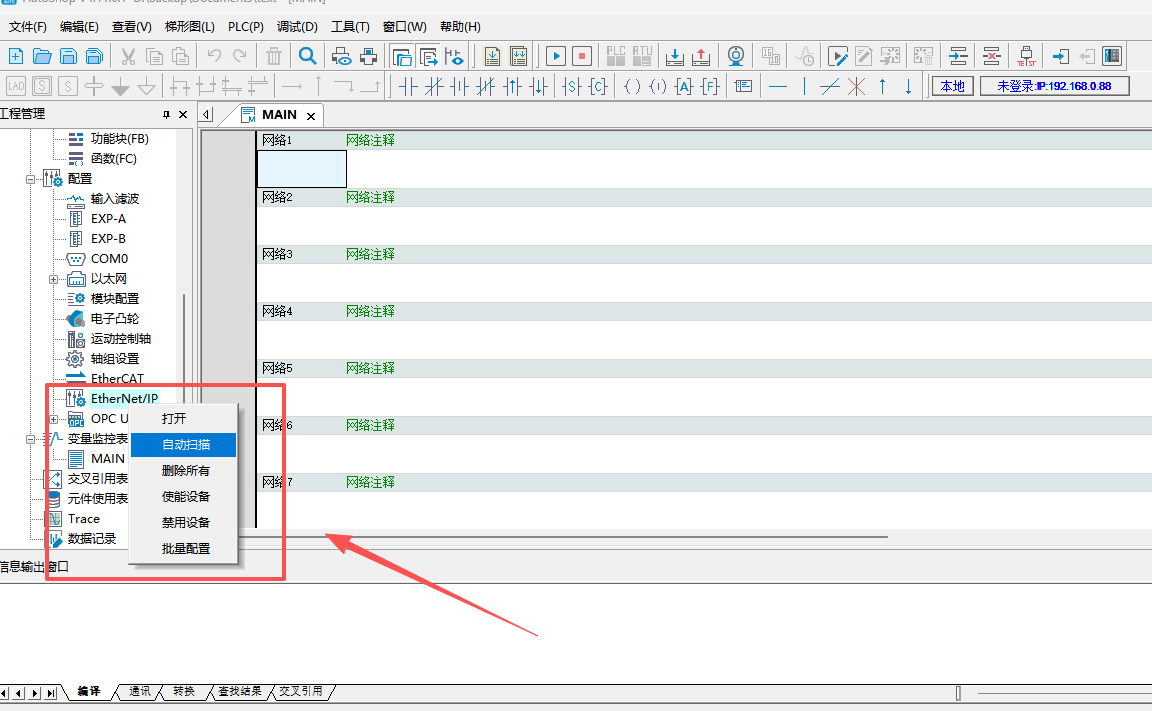
Method 2: Manual Module Addition
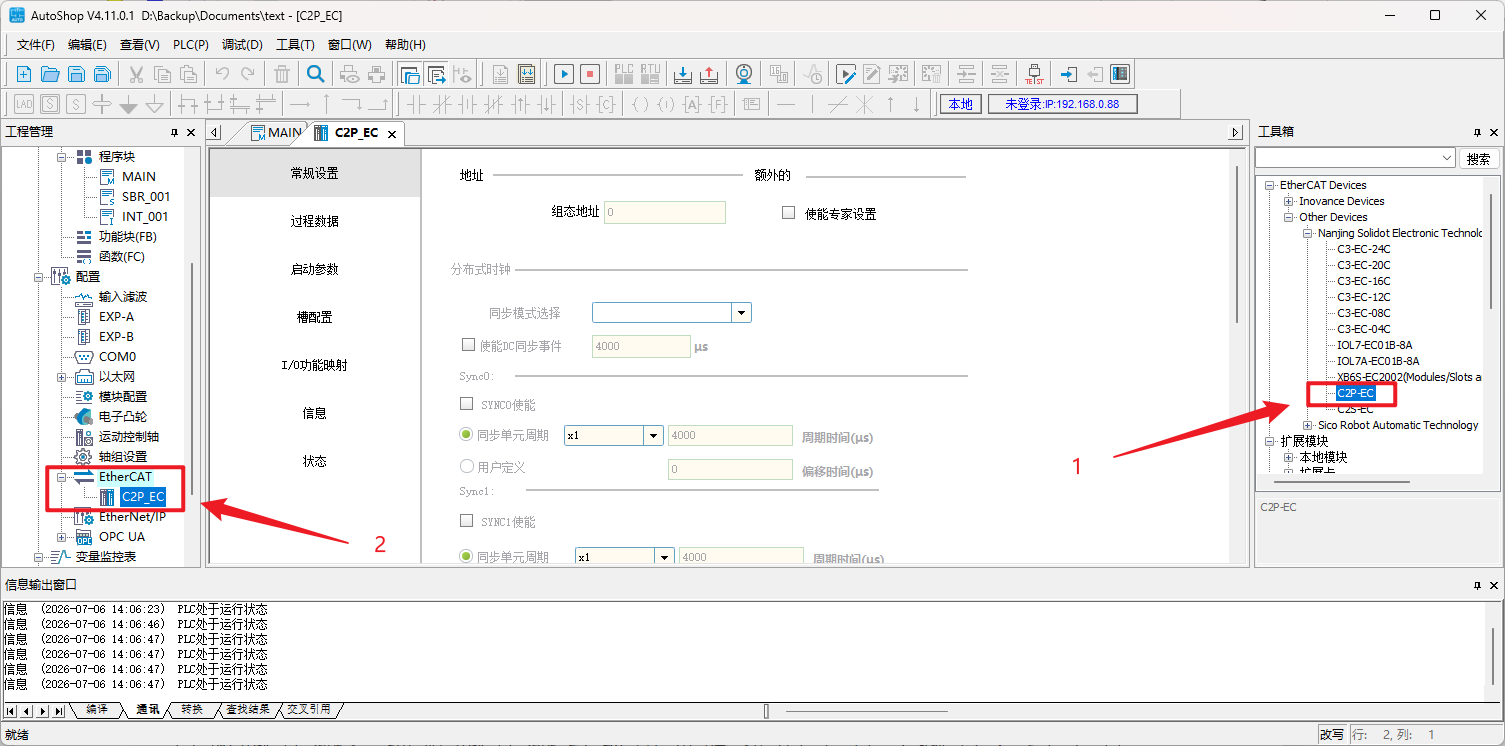
In the toolbox on the right, expand "EtherCAT Devices", find "C2P-EC", and double-click to add it to the configuration. Then click the added "C2P-EC" to enter the configuration interface, click "Slot Configuration", and add the corresponding model according to the actual device (C2P-EC-12B is used in this example).
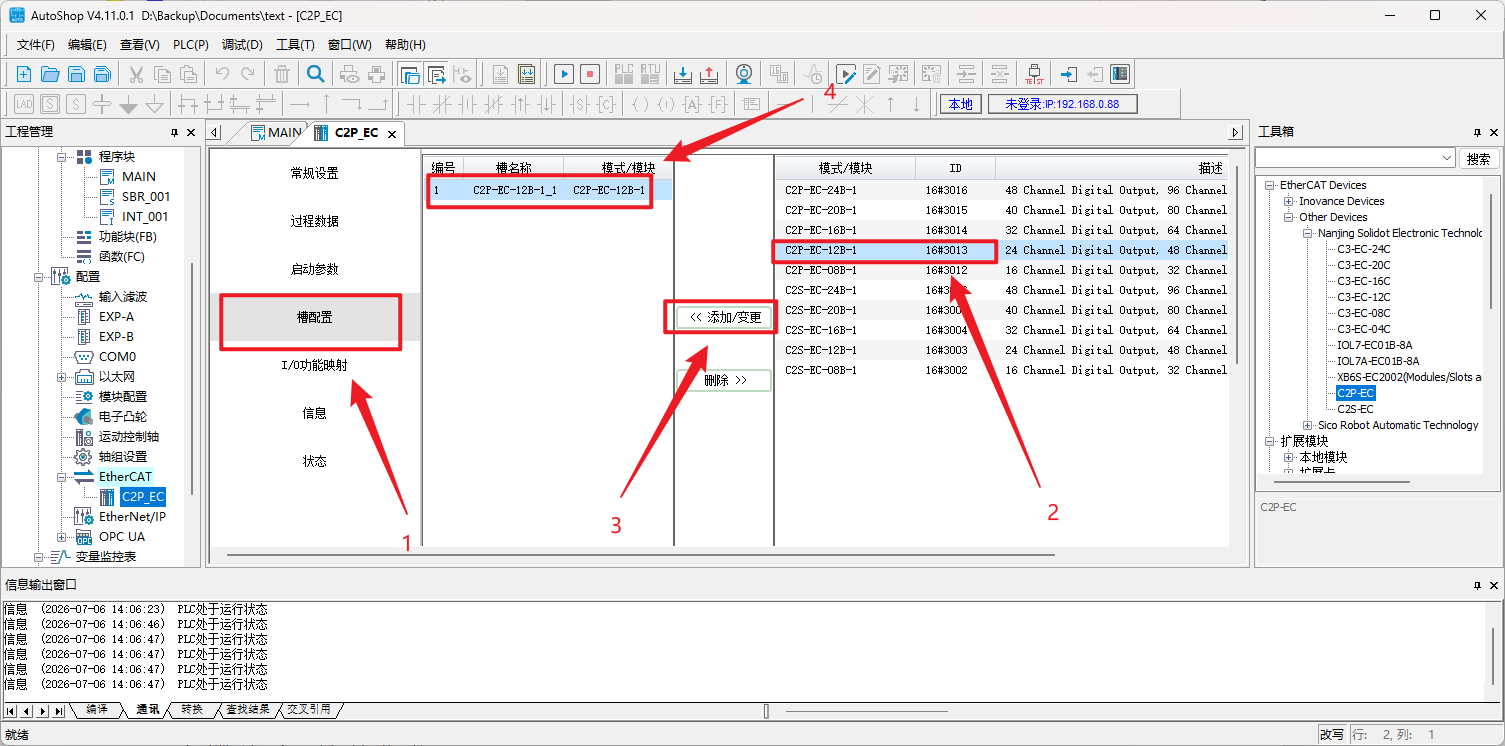
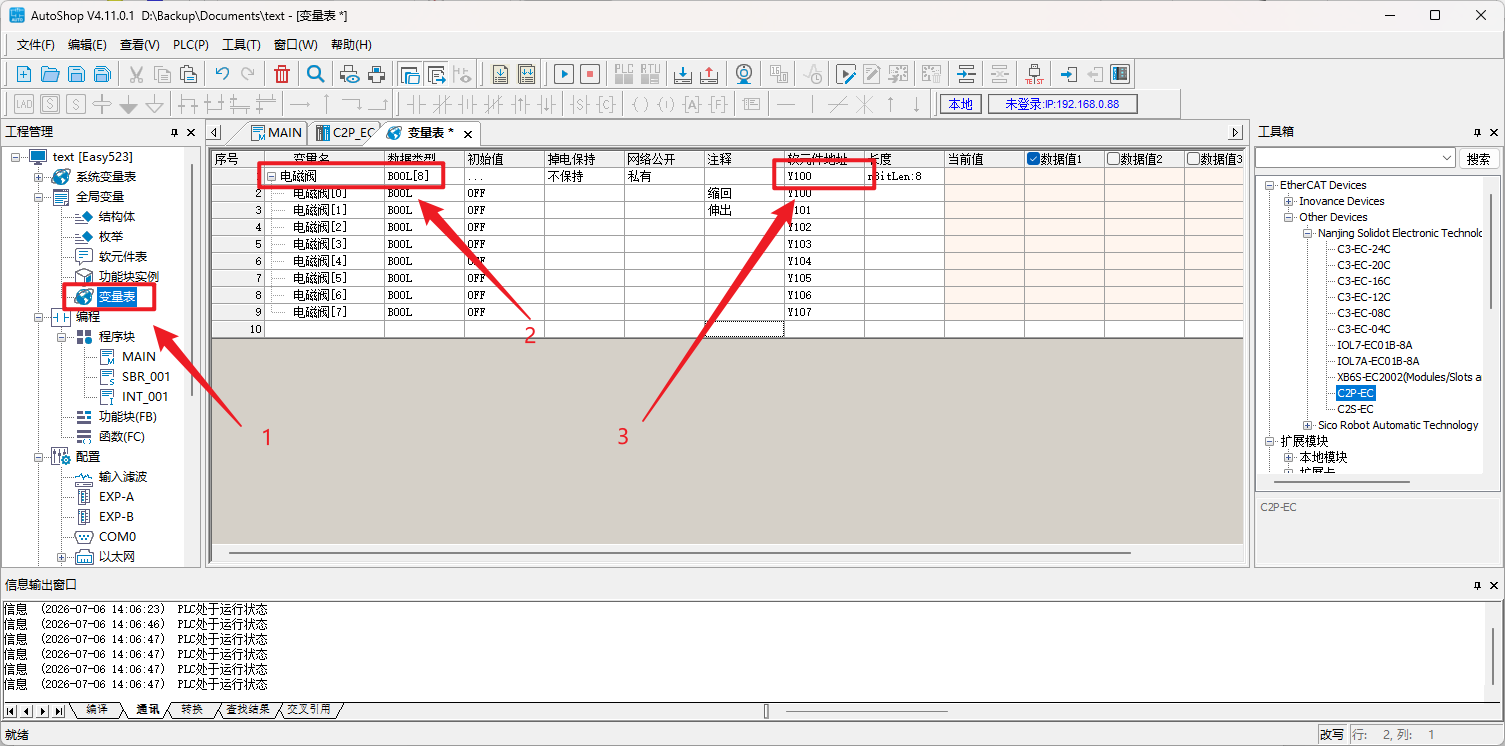
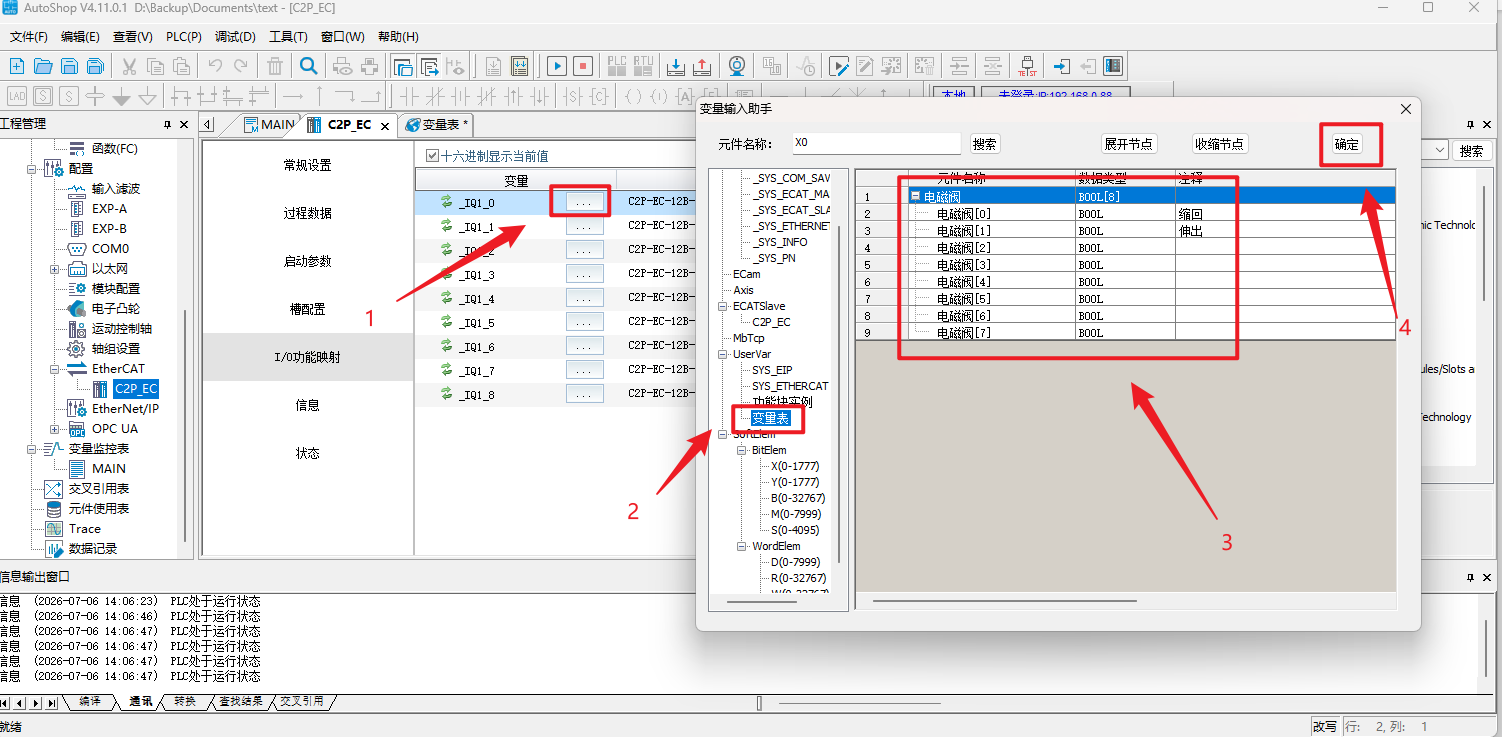
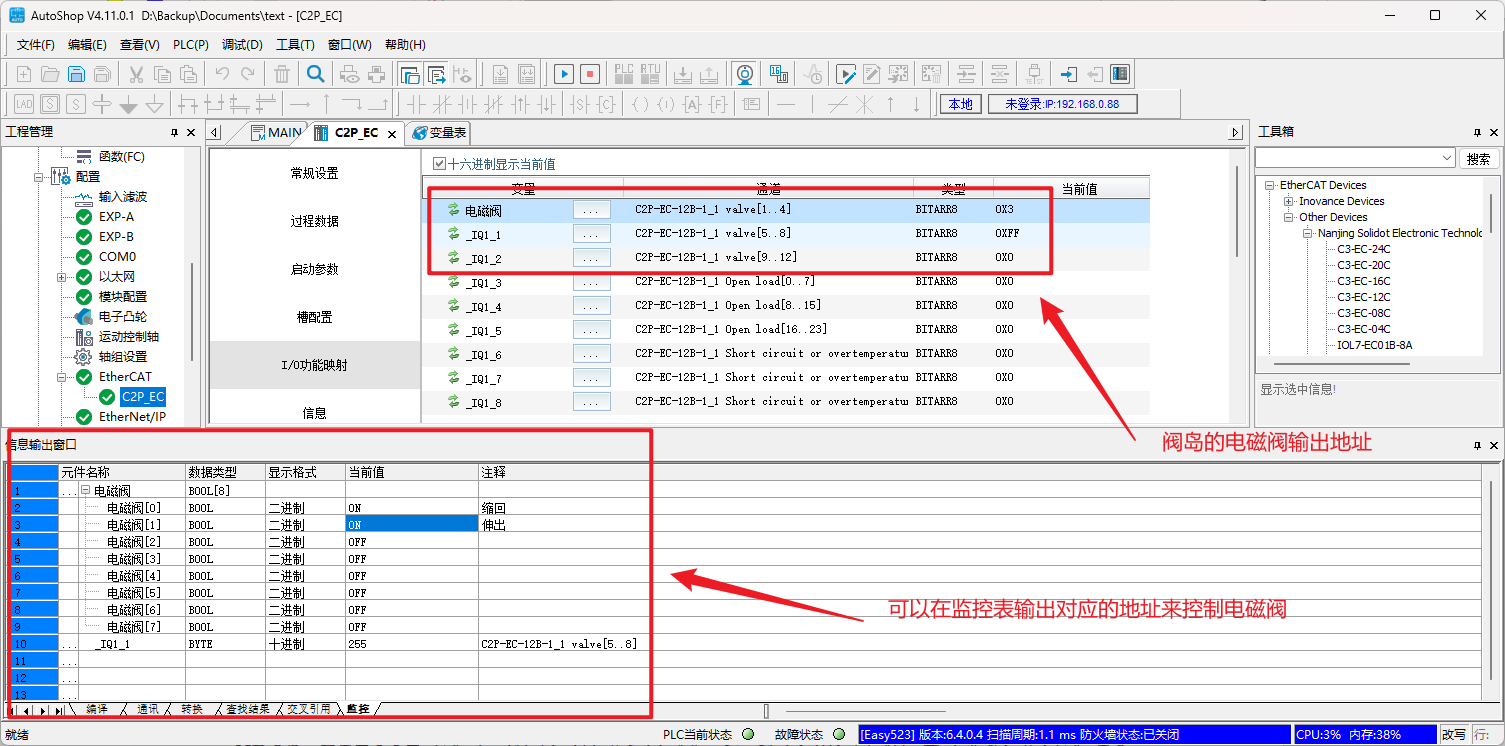
Bind I/O Variable Addresses: You can use the default cache addresses provided by Inovance, or create your own addresses in the variable table and bind them to the output mapping as shown.
V. Configuration Download
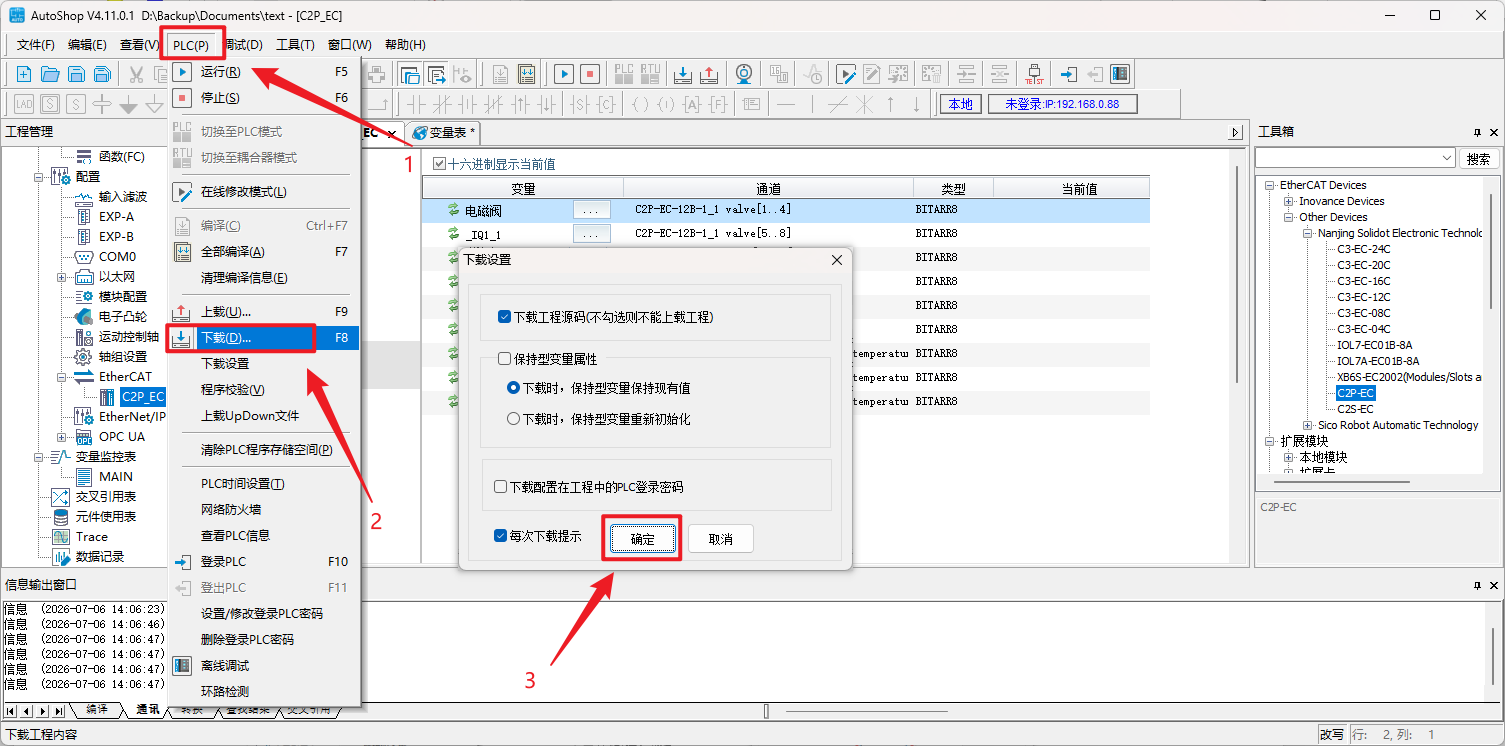
Click "PLC" → "Download" → "OK" and wait for the download to complete. After the download, power cycle both the PLC and the coupler.
Safety Note: Before restarting, confirm that the on-site equipment is in a safe state to avoid unintended valve island outputs causing equipment movement.
VI. I/O Address Monitoring and Usage
After successful communication establishment, read or control operations can be performed in the program directly through global variables mapped to the corresponding addresses.
VII. Important Notes
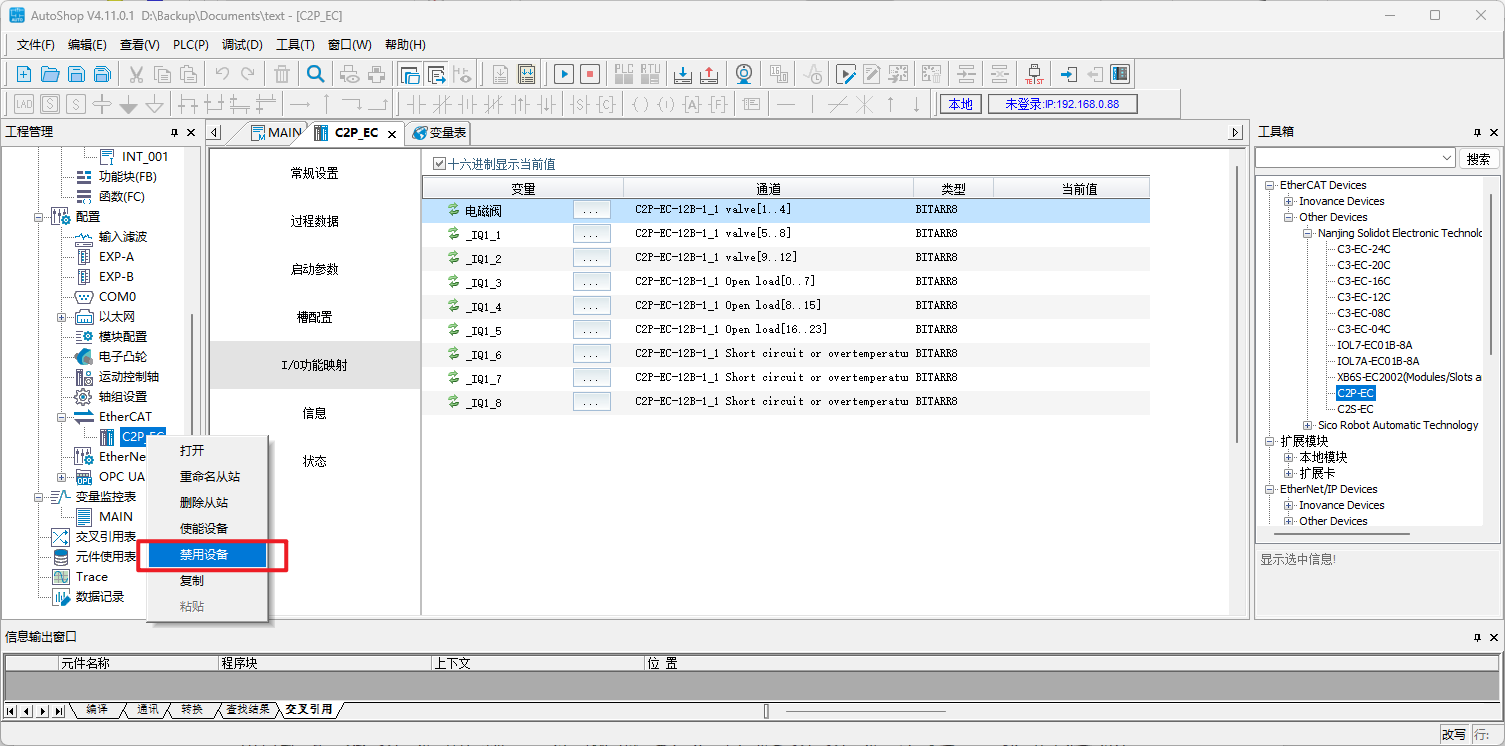
In the "EtherCAT Settings", if a device is set to "Disabled" status, AutoShop will not communicate with that device via EtherCAT. Please confirm that all devices requiring communication are in enabled status.