Knowledge

Quick overview
1. Applicable products
2. Protocol conversion
PROFINET slave (connected to the Siemens PLC side) ↔ CANopen master (connected to the slave device side)
3. Applicable masters
Siemens S7-1200/1500 series PLC (TIA Portal)
4. Configuration tool
TIA Portal (PROFINET side) + sDot GW CANopen Manager (CANopen side)
5. Core value
After configuration is complete, the operator only needs to read and write standard I/O addresses, without needing to know the details of the CANopen protocol
How do Siemens S7-1200/1500 PLCs interconnect and exchange data with CANopen slave devices?
This can be achieved with the Solidot protocol conversion gateway GW4U-COM-PNS. Simply read and write the I/O addresses in TIA Portal to control CANopen devices and acquire data. This article describes the steps for adding the gateway in TIA Portal, configuring the CANopen-side parameters and verifying I/O reads and writes.
1. Solution topology
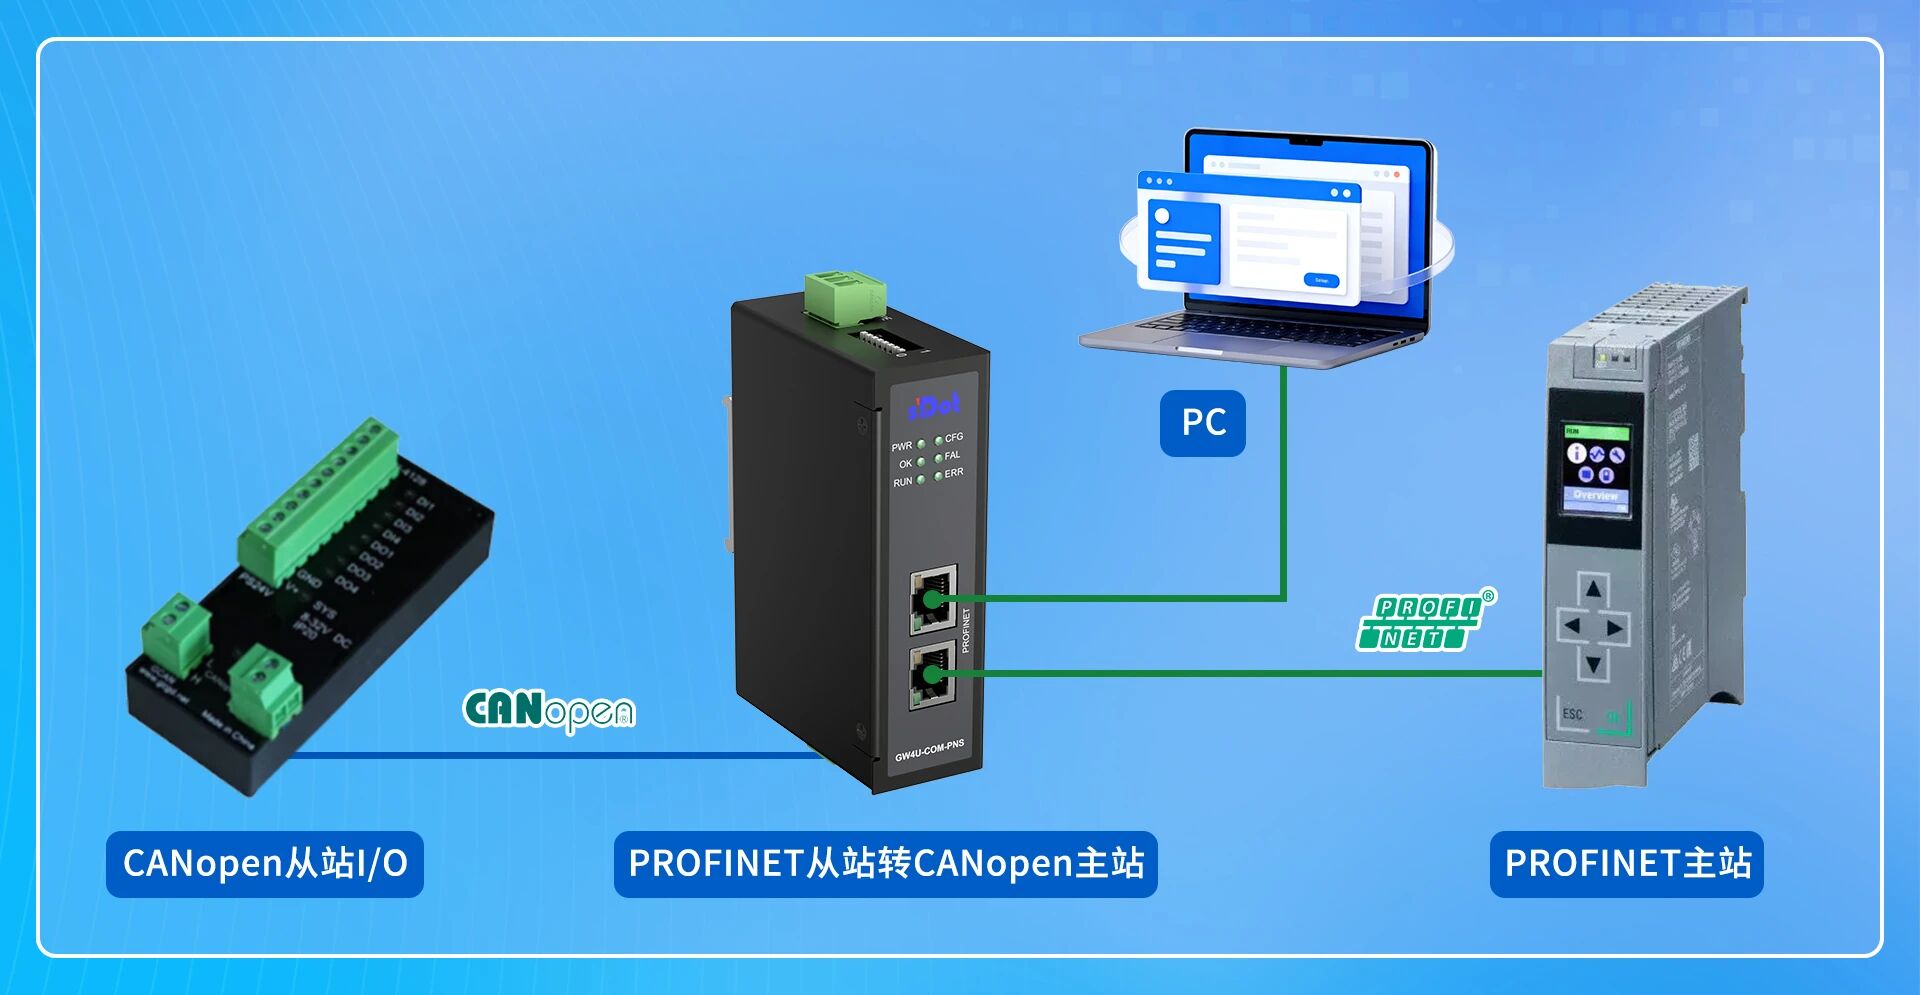
Siemens PLC (PROFINET master) ↔ GW4U-COM-PNS (PROFINET slave to CANopen master) ↔ CANopen slave I/O devices (or CANopen servo drives, frequency converters, etc.)
2. Configuration steps
1. Adding the gateway in TIA Portal
Solidot provides the GSD file for the GW4U-COM-PNS gateway. Import the GSD file into TIA Portal, and the gateway device can then be found in the hardware catalog. Drag the gateway into the network view, connect it to the PROFINET interface of the PLC, and complete the PROFINET-side configuration.
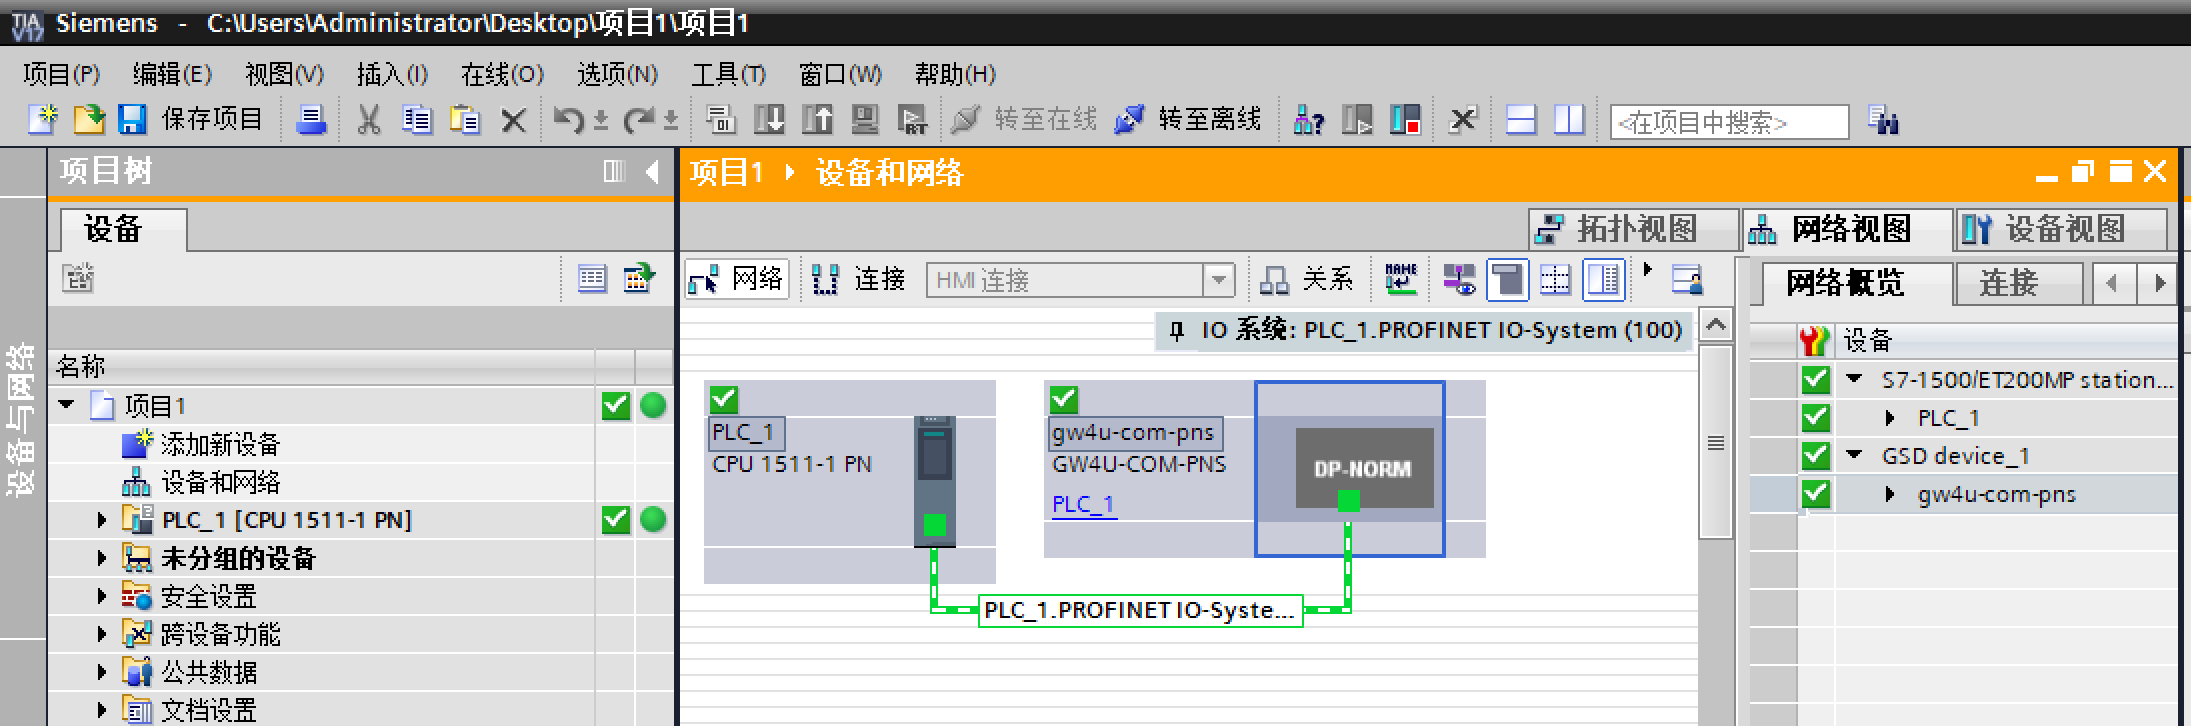
Note: The GSD file can be downloaded from the product page on the Solidot website. The import procedure is the same as for a standard GSD file; installation is completed via "Options → GSD File Management (GSD)" in TIA Portal.
2. Configure the CANopen side
Use the sDot GW CANopen Manager configuration software provided by Solidot to complete the parameter configuration on the CANopen bus side:
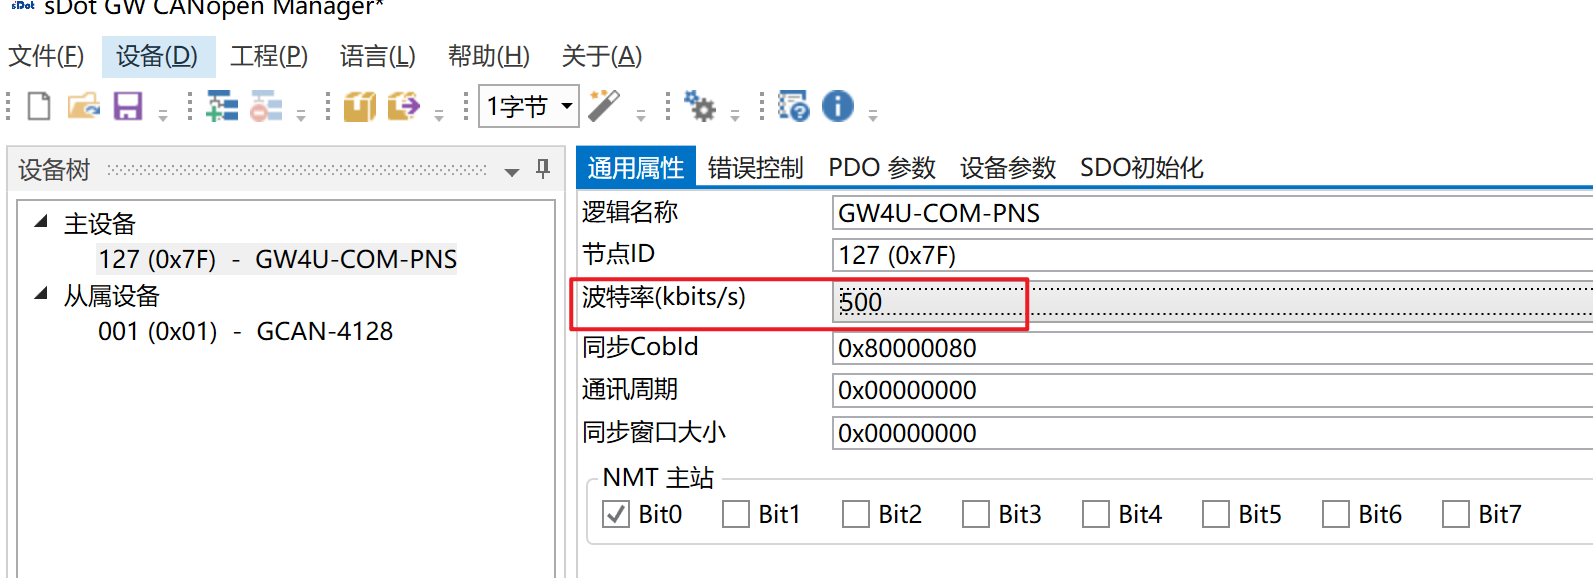
(1) Basic parameter settings
Set the baud rate and Node ID of the CANopen bus, and make sure they match the configuration of the CANopen slave device.
(2) PDO Mapping configuration
PDO Mapping is the key step that binds the control parameters of the CANopen slave to the input and output addresses of the gateway. Procedure: import the EDS file provided by the CANopen slave manufacturer. The configuration software automatically parses the available parameter list, and PDO Mapping is completed by simply clicking, making the operation intuitive.
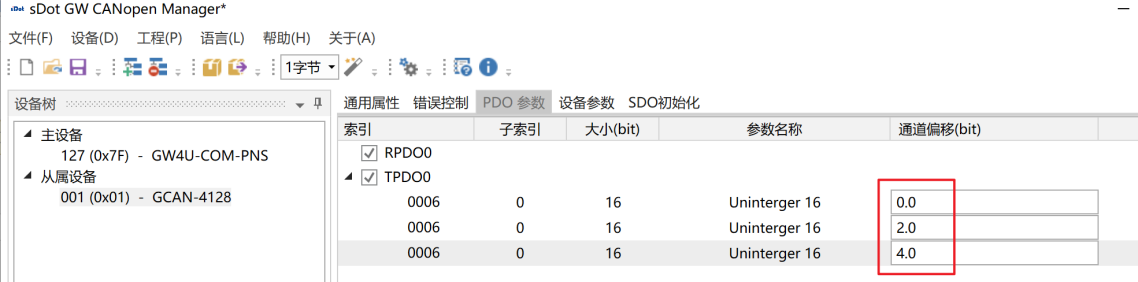
Note: The EDS file is provided by the manufacturer of the CANopen slave device. After import, the software automatically identifies the parameters supported by the device, so there is no need to manually enter the Object Dictionary.
(3) I/O address mapping and read/write verification on the TIA Portal side
After the above configuration is complete, the TIA Portal side exchanges data with the CANopen slave through the following address ranges:
Direction | TIA Portal address range | Valid bits in this example | Description |
Inputs | IB0–IB63 | DI1–DI4 (the first 4 bits of IB0 are valid, the last 4 bits are reserved) | Read the input status of the CANopen slave |
Outputs | QB0–QB63 | DO1–DO4 (the first 4 bits of QB0 are valid, the last 4 bits are reserved) | Control the output channel of the CANopen slave |
In this example, the slave is a 4DI/4DO I/O device. The inputs and outputs each occupy 1 byte, with the first 4 bits carrying valid data and the last 4 bits reserved.
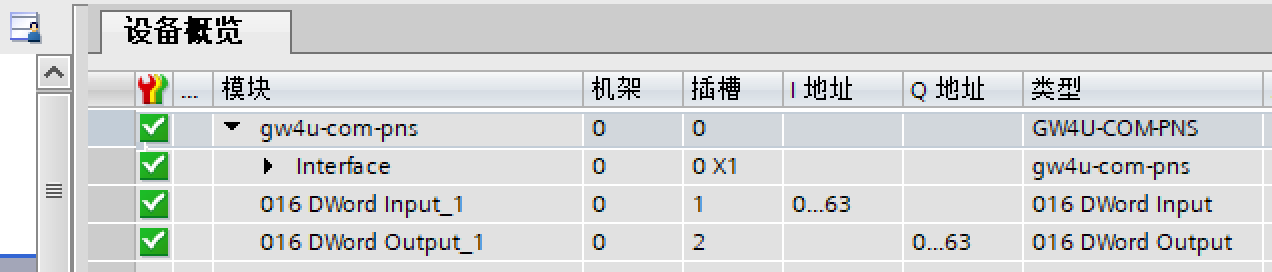
①Controlling the CANopen slave output channels
In the TIA Portal watch table, assign a value to the output byte corresponding to QB0. This example controls the output of channels DO1, DO2 and DO4, while DO3 does not output: write the corresponding bit values and execute "Modify all selected values once immediately". After confirming that the write was successful, observe that the channel indicators for DO1, DO2 and DO4 on the physical slave light up.
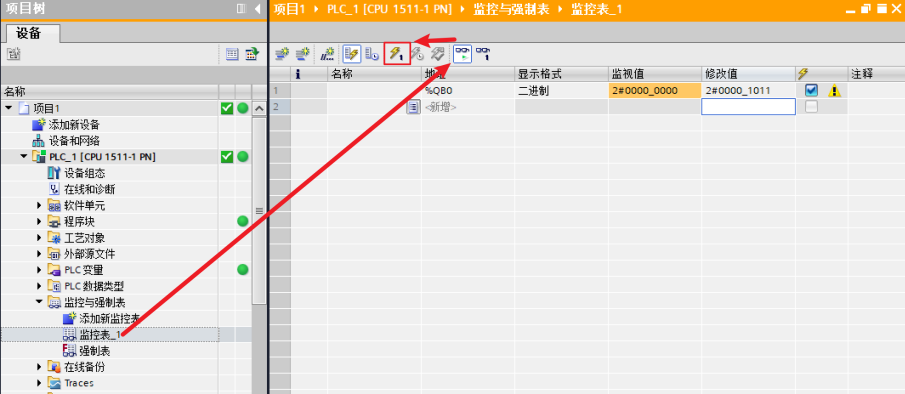
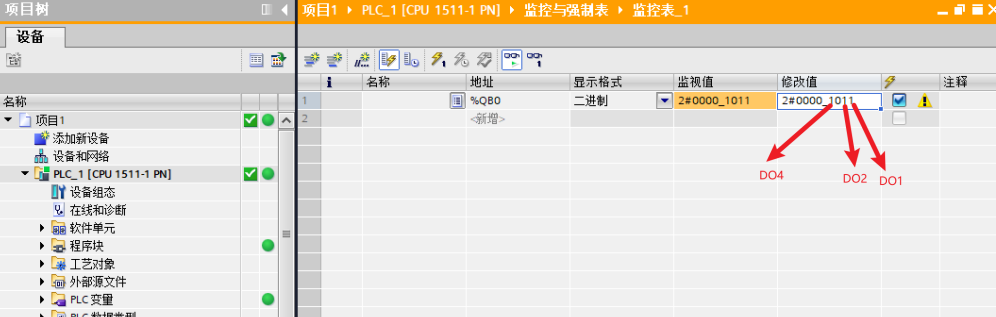
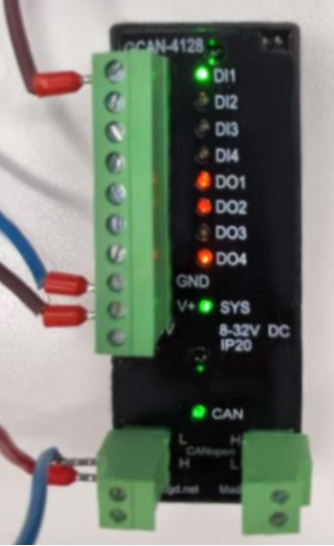
②Acquiring the CANopen slave input channels
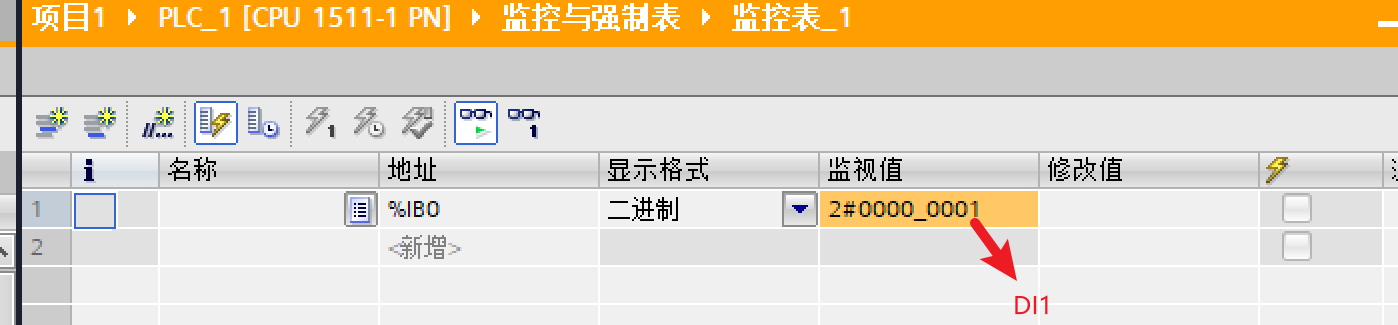
Monitor the IB0 address in the TIA Portal watch table. After applying a valid input signal to DI1 of the slave, the change in input status can be read at the corresponding bit of IB0, verifying that the input acquisition function works properly.
3. Application summary
After protocol conversion is performed via the GW4U-COM-PNS gateway, the way in which the Siemens PLC controls CANopen devices becomes very intuitive. The details are summarized as follows:
• Starting the inverter: write the start command to the corresponding Q address;
• Adjusting the motor speed: write the target speed value to the corresponding output word;
• Reading the device status: read the status data directly from the corresponding I address.
Throughout the entire control process, the operator does not need to deal with any details of the CANopen protocol; all that is seen are standard I/O mapping read and write operations, which is completely identical to operating ordinary distributed I/O devices.