How to assign station alias to XB6S-EC2002 and switch to alias addressing mode in InoProShop?
Article Overview
1. Applicable Product
2. Configuration Tool
InoProShop
3. Core Operations
Scan slaves → Write station alias → Power cycle and verify → Switch to alias mode → Download program and communicate
4. Key Prerequisite
Alias addressing mode requires that the alias address configured in the software must match the alias actually written to the slave
5. Important Note
After writing the station alias, the slave must be power-cycled for the setting to take effect; the PLC must be switched to STOP state before scanning
In InoProShop, how to assign a station alias to the Solidot Slice EtherCAT coupler XB6S-EC2002 and switch the EtherCAT communication to alias addressing mode?
InoProShop supports two addressing modes: position addressing and alias addressing. Alias addressing mode requires that the slave device be pre-assigned a station alias, and the alias address configured in the software must match the actual value stored on the slave. This article uses XB6S-EC2002 as an example, introducing the basic rules of alias addressing, alias writing, verification, and the complete process of alias mode communication.
I. Difference Between Alias Addressing and Position Addressing
The two addressing modes in InoProShop are compared as follows. Choose the appropriate mode based on your actual scenario.

II. Scan Slave Devices
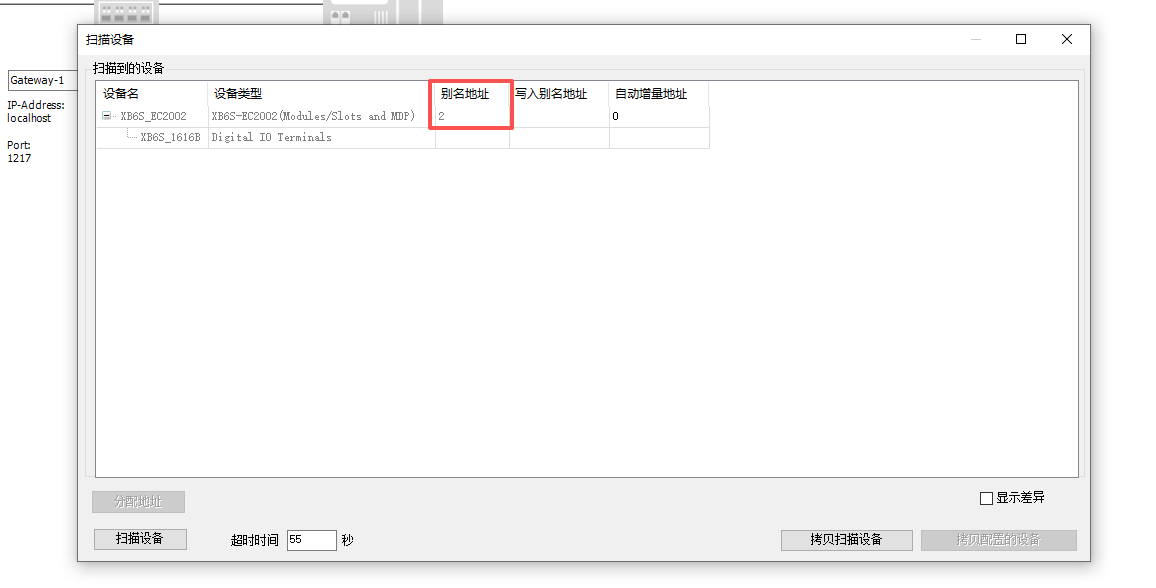
In InoProShop, right-click "EtherCAT" and select "Scan Devices". After scanning, XB6S-EC2002 and its attached I/O modules can be correctly identified.
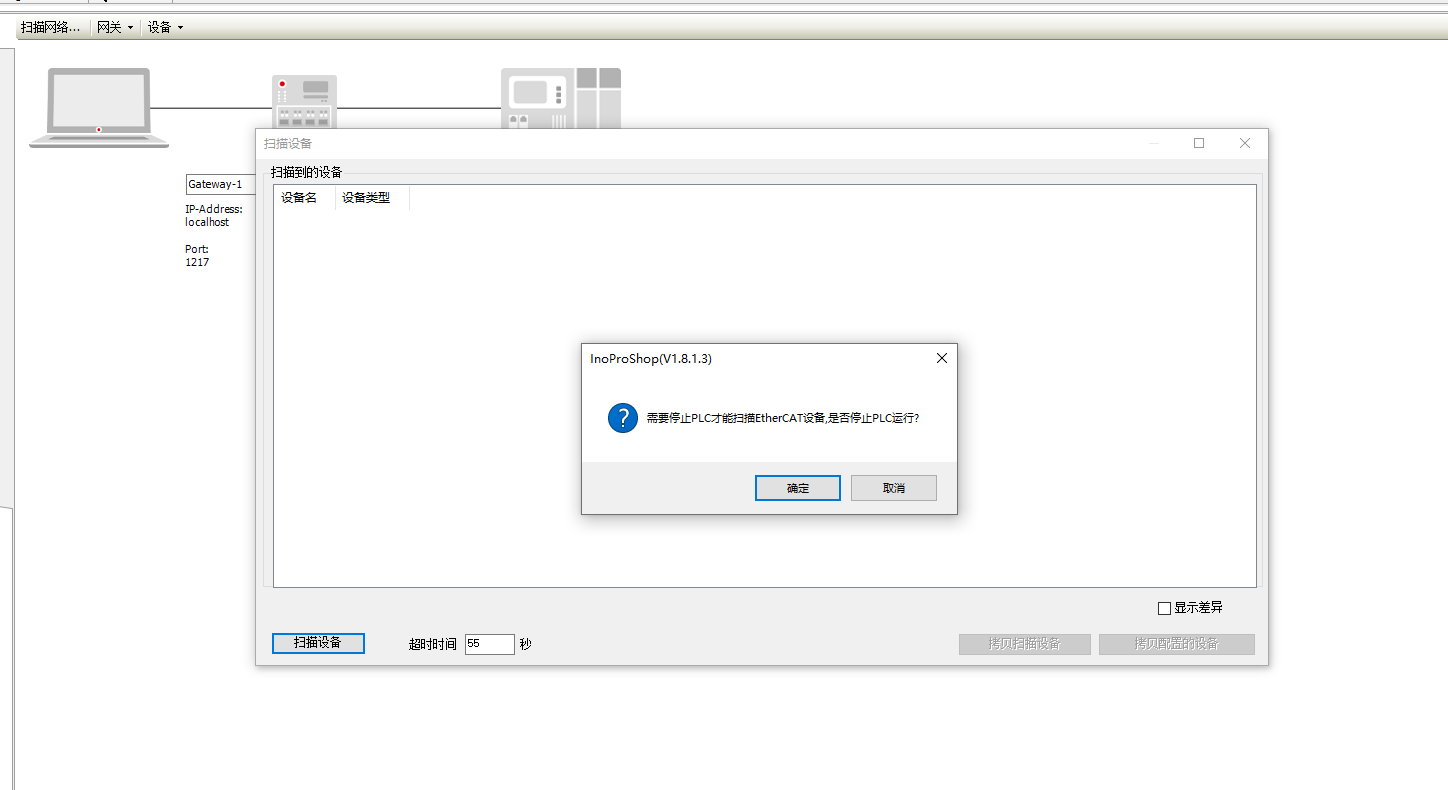
Note: Before scanning, the PLC must be switched to STOP state (Stop PLC) to ensure the device is in a safe condition.
III. Write Station Alias
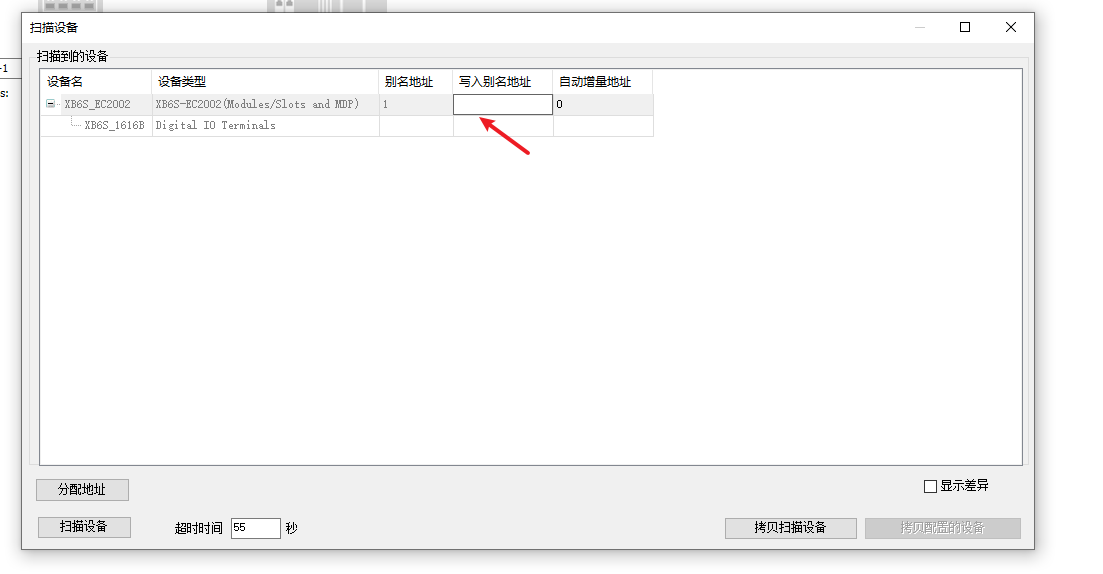
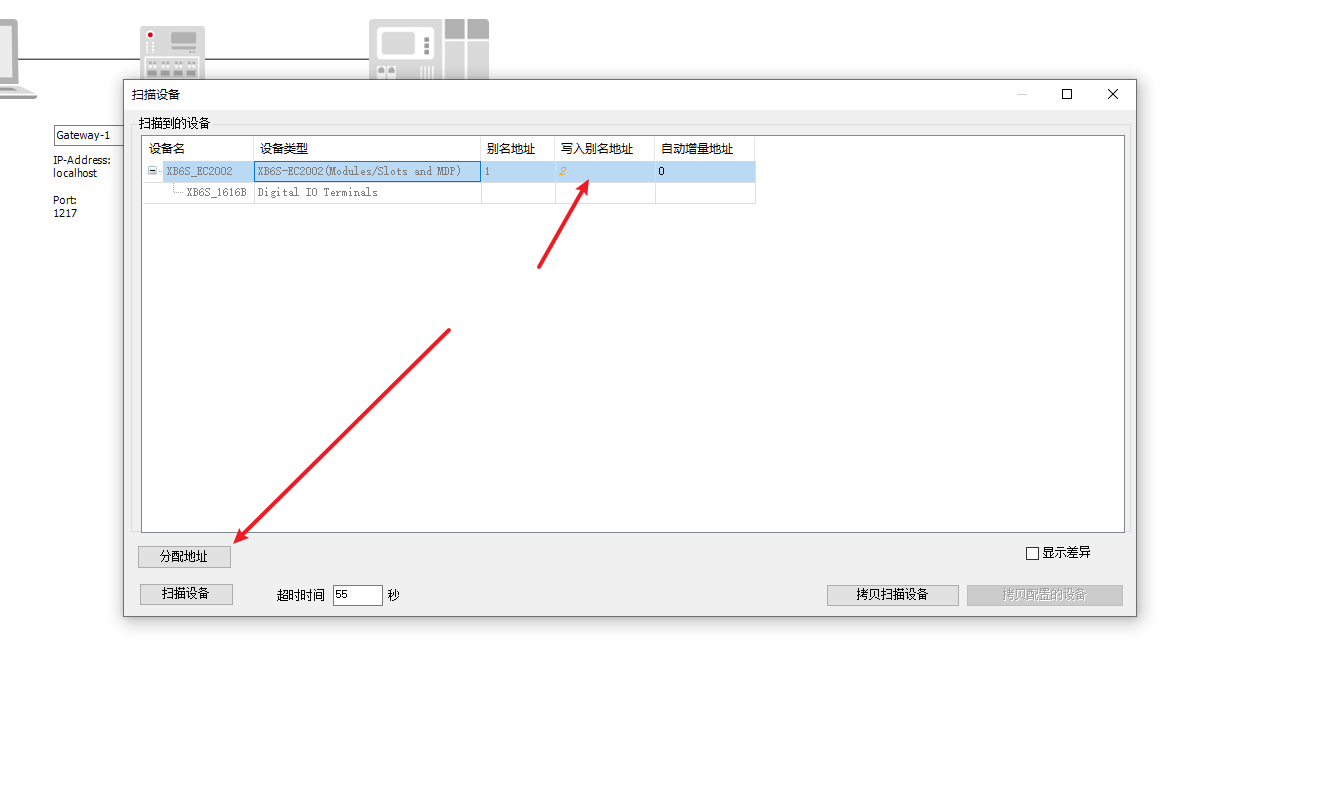
In the scan results, find XB6S-EC2002, enter the target alias value in the "Write Alias Address" input field (in this example, 2), and click the "Assign Address" button. When the software displays a success prompt, the station alias has been successfully written to the slave.
IV. Power Cycle and Verify Alias Takes Effect
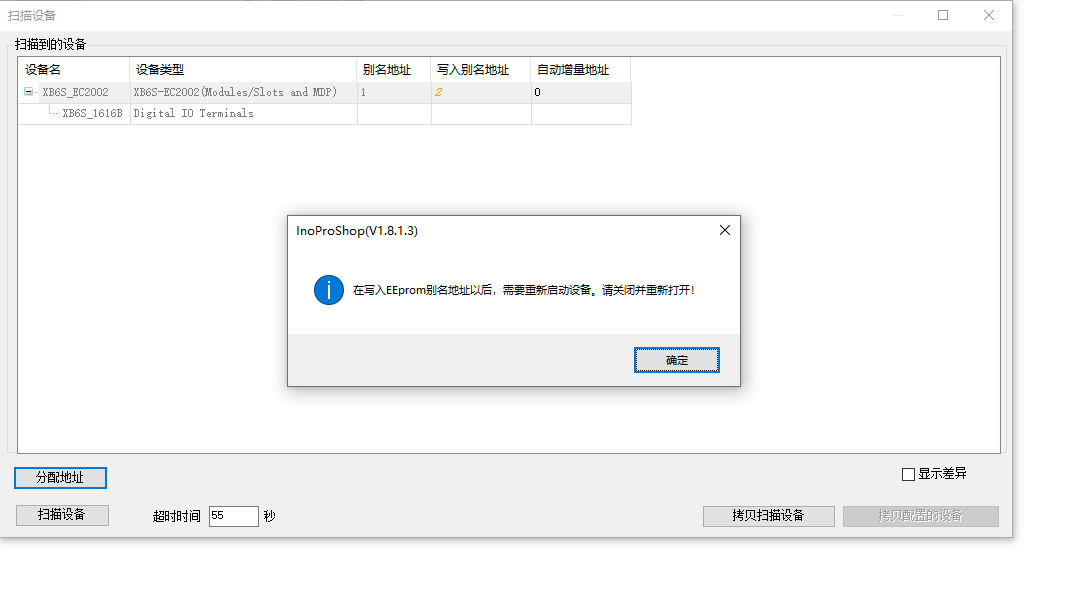
After writing the station alias, the XB6S-EC2002 slave must be power-cycled for the alias setting to take effect.
After restart, re-scan the slave in InoProShop and confirm that the station alias in the scan results has been updated to 2, verifying successful writing.
Note: If the station alias is not power-cycled after writing, the new alias will not take effect, and normal communication will not be possible when switching to alias mode.
V. Switch to Alias Mode and Establish Communication
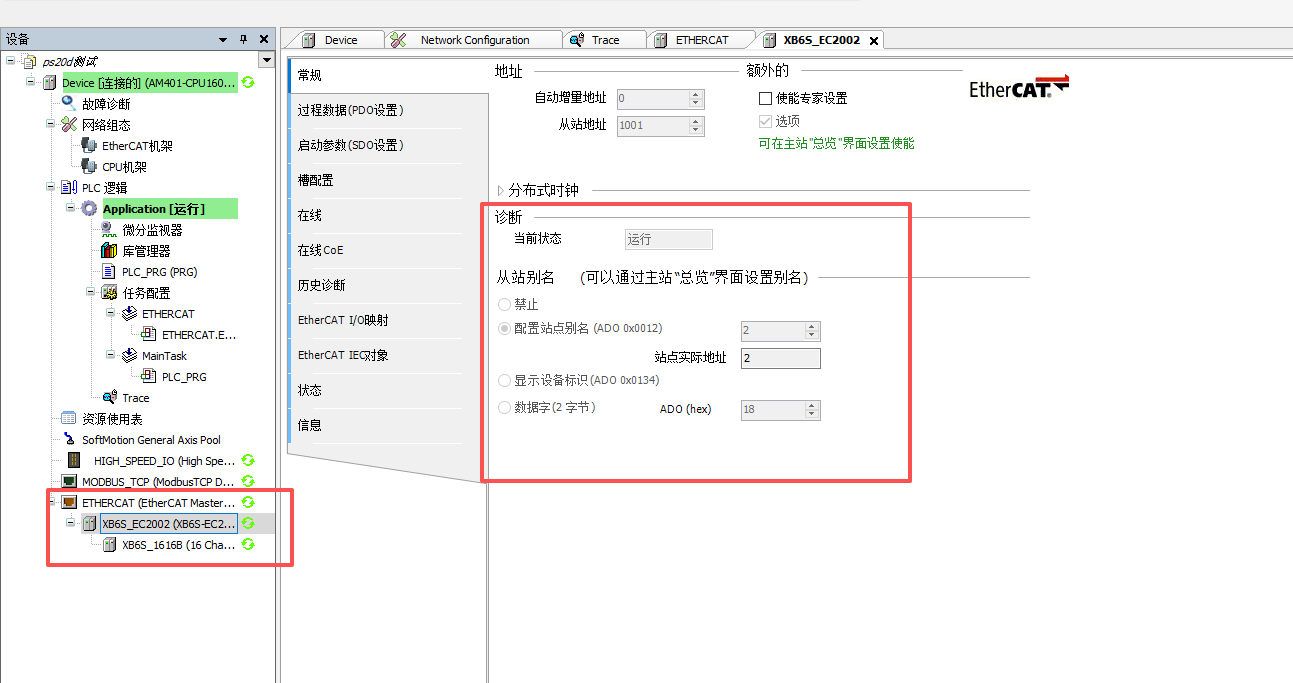
Double-click "EtherCAT", change the addressing mode from position mode to "Alias Mode", and set the coupler's alias address to 2 (must match the alias value actually written to the slave).

After logging in and downloading the program to the PLC, confirm that the EtherCAT communication status is normal, indicating that the alias mode configuration is complete.
Tip: The alias address configured in the software must exactly match the station alias value stored on the slave device; otherwise, communication cannot be established.