Knowledge

In this article
1. Demo product
2. Companion platform
Inovance Easy-523 PLC + AutoShop V4.11
3. Communication protocol
EtherNet/IP
4. IP address modification
Physical DIP switch or host software IOConfigToolSetup_2.1.6
5. Configuration workflow
Modify IP → create new project → PLC communication → import EDS file → module configuration → download → I/O address monitoring
6. Key notes
After the EDS file is imported successfully, the AutoShop software must be restarted manually before the newly imported device configuration can be used
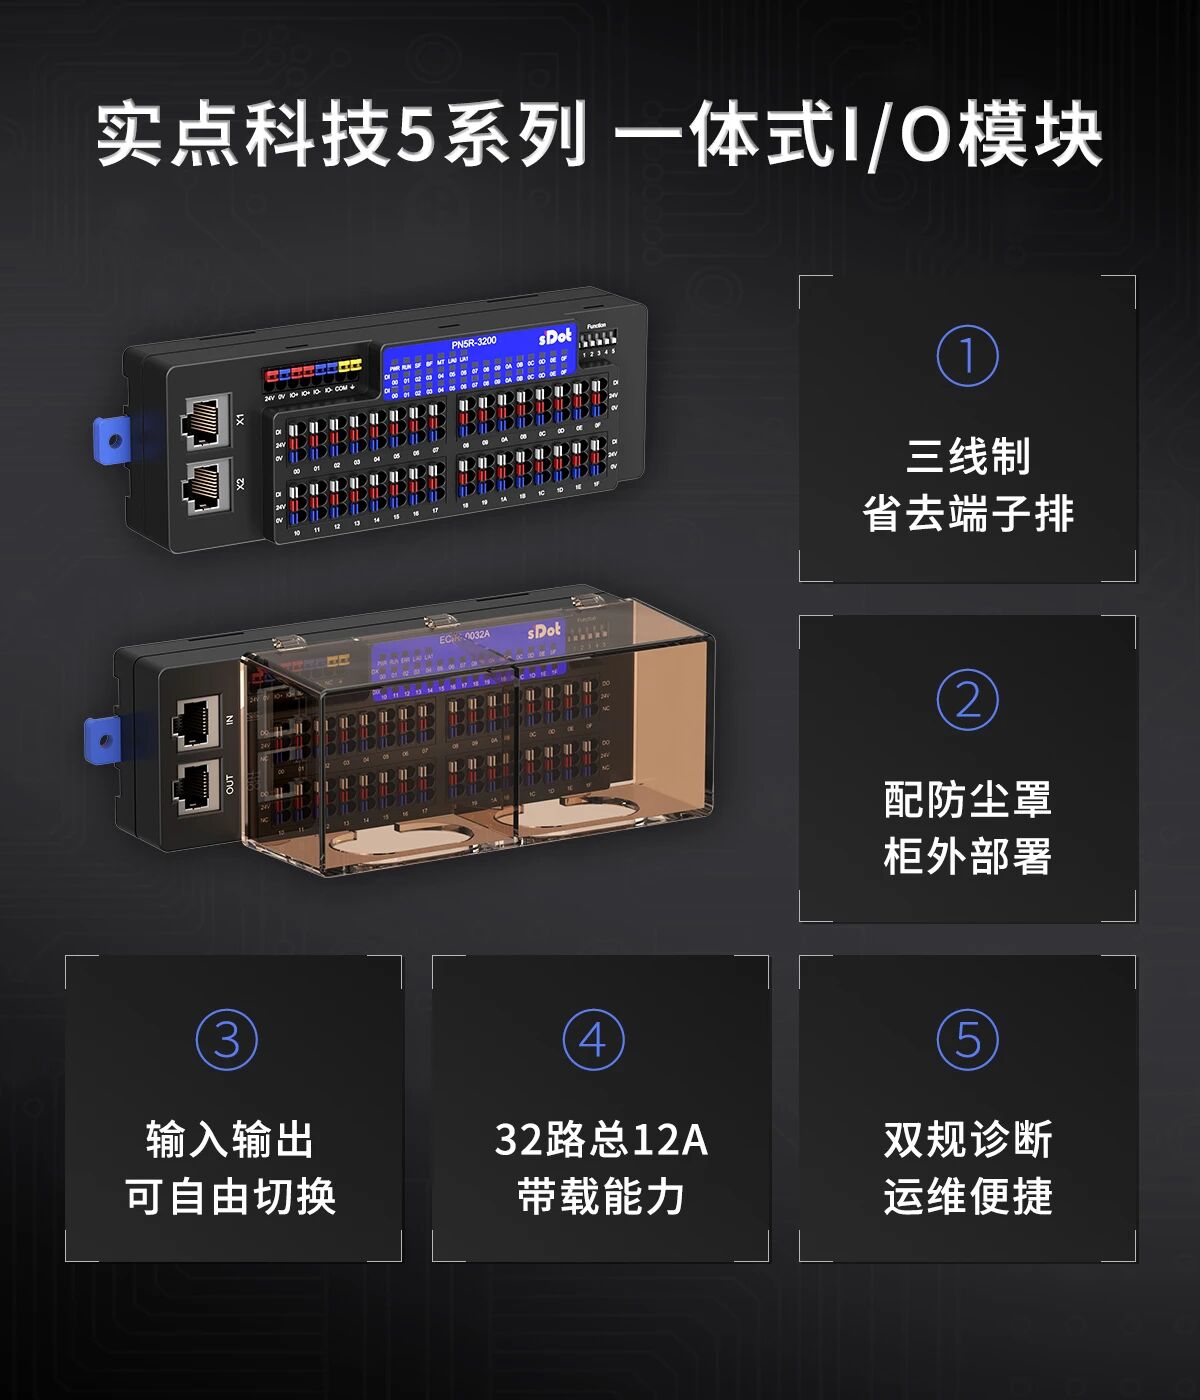
The EI5R-1616A+ is a Solidot 5-series integrated I/O with 16-channel digital NPN input / 16-channel digital NPN input & output compatibility. When it is connected to an Inovance Easy-523 PLC for EtherNet/IP communication, device configuration must be completed in AutoShop before data exchange can take place. So what preparations are needed before configuration?
Two points directly determine whether subsequent communication can be established — the module's IP address must be in the same network segment as the PLC, and the EDS device description file must be imported successfully and take effect after restarting AutoShop. This article uses an Inovance Easy-523 PLC + AutoShop V4.11 as an example to demonstrate the complete configuration and communication steps, from IP address modification, EDS file import, and module configuration to I/O address monitoring.
Modifying the module IP address
The module's factory default IP address is 192.168.0.120. If the target PLC is in the same network segment as the module and only the last digit of the IP address needs to be changed, it can be adjusted either via the physical DIP switch or the host software; if the target network segment is different, the host software must be used to modify the complete IP address.
Method 1: Setting via the physical DIP switch
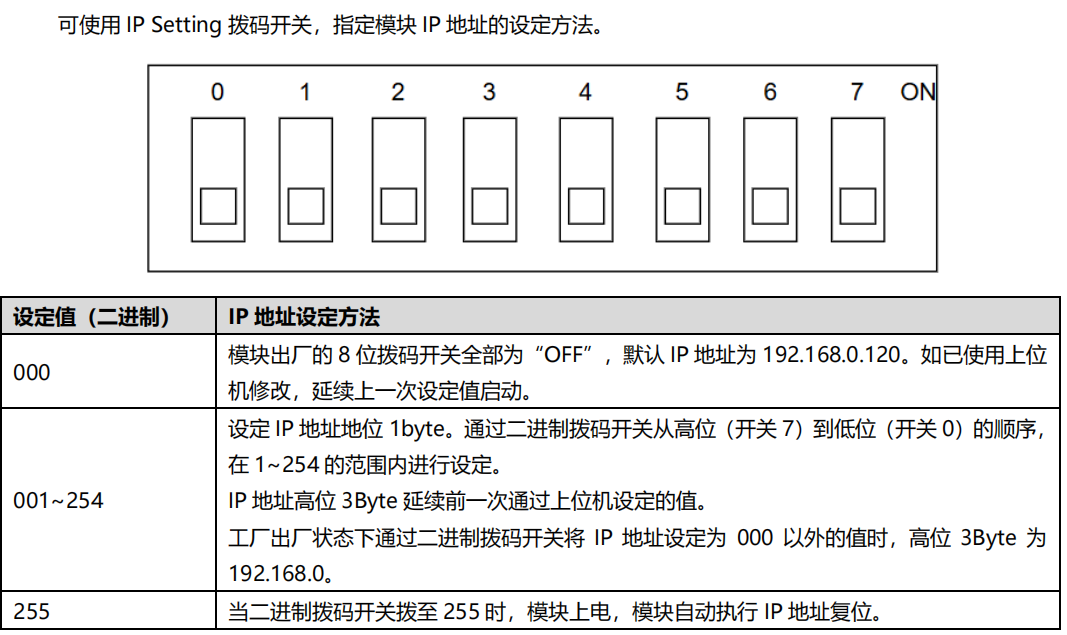
The module side panel has an 8-position IP DIP switch (numbered 0 to 7, from high-order switch 7 to low-order switch 0), used to set the last byte of the IP address. When all 8 DIP switches are OFF (i.e. 000), the module uses the factory default IP 192.168.0.120; when the DIP switches are in the range 001 to 254, the IP address takes effect according to the binary rule after a power cycle and restart.
[example] Set only switch 5 and switch 4 to ON and keep the others OFF. Written in binary from high order to low order, this is 00110000, which converts to 48 in decimal; after a power cycle and restart, the module IP address then becomes 192.168.0.48 (the upper 3 bytes continue the factory value 192.168.0 or the value previously set by the host software).
Method 2: Configuration via host software
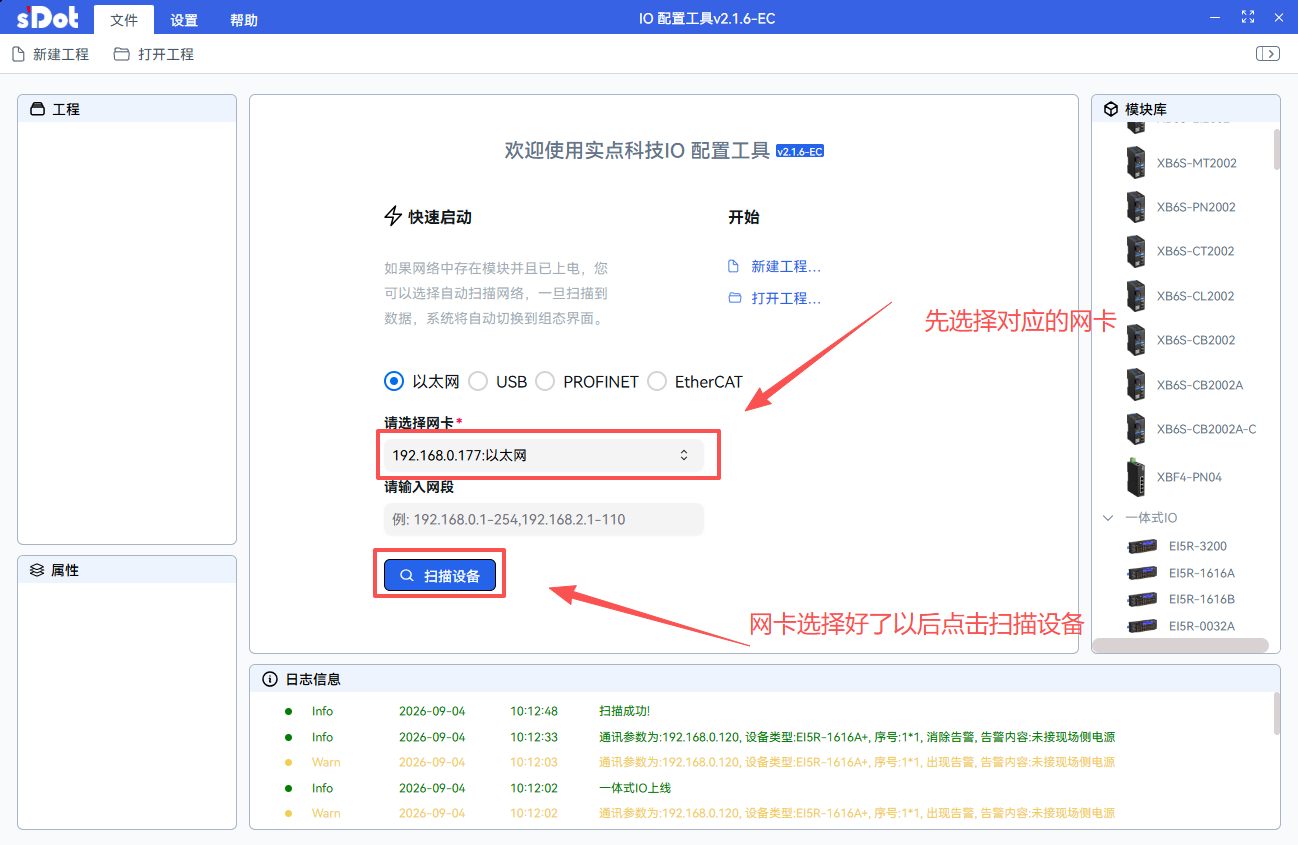
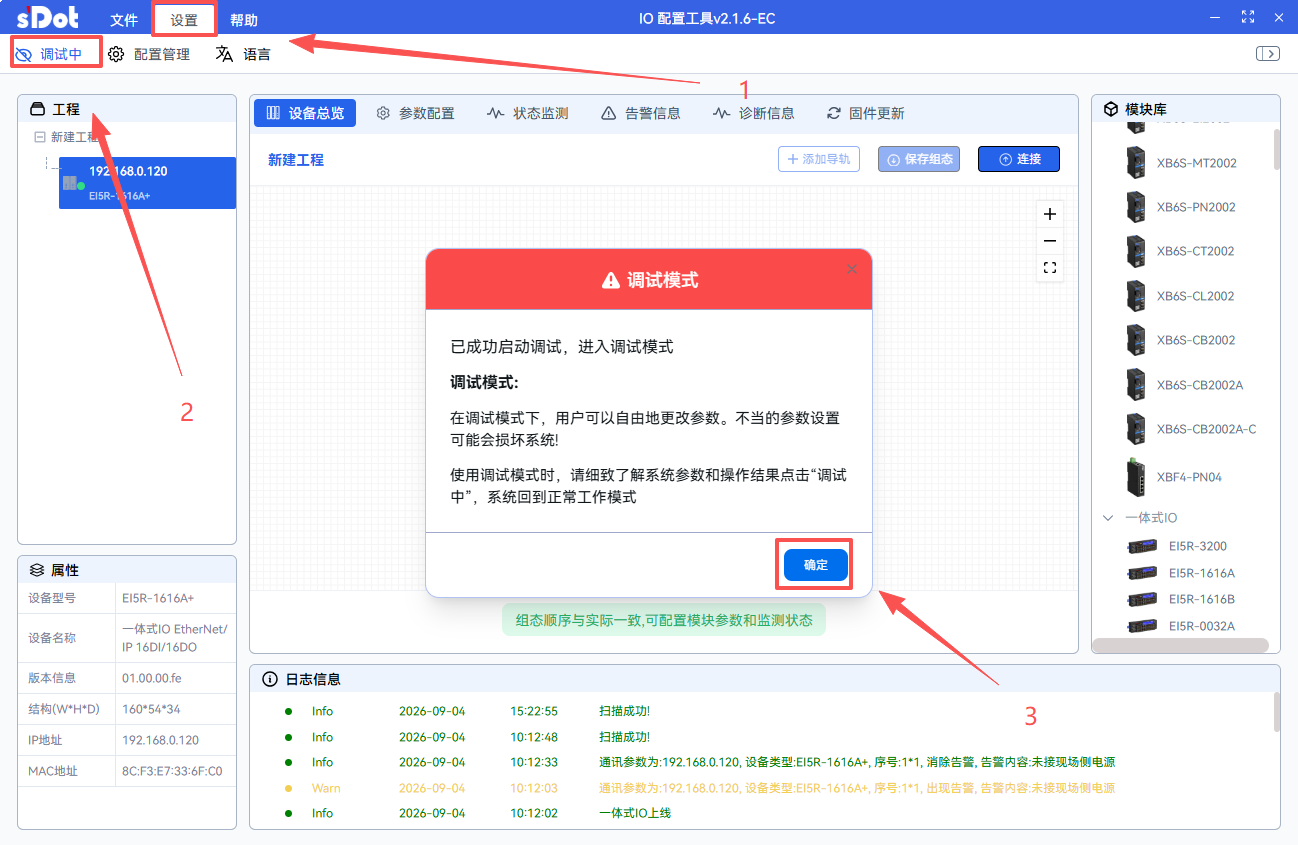
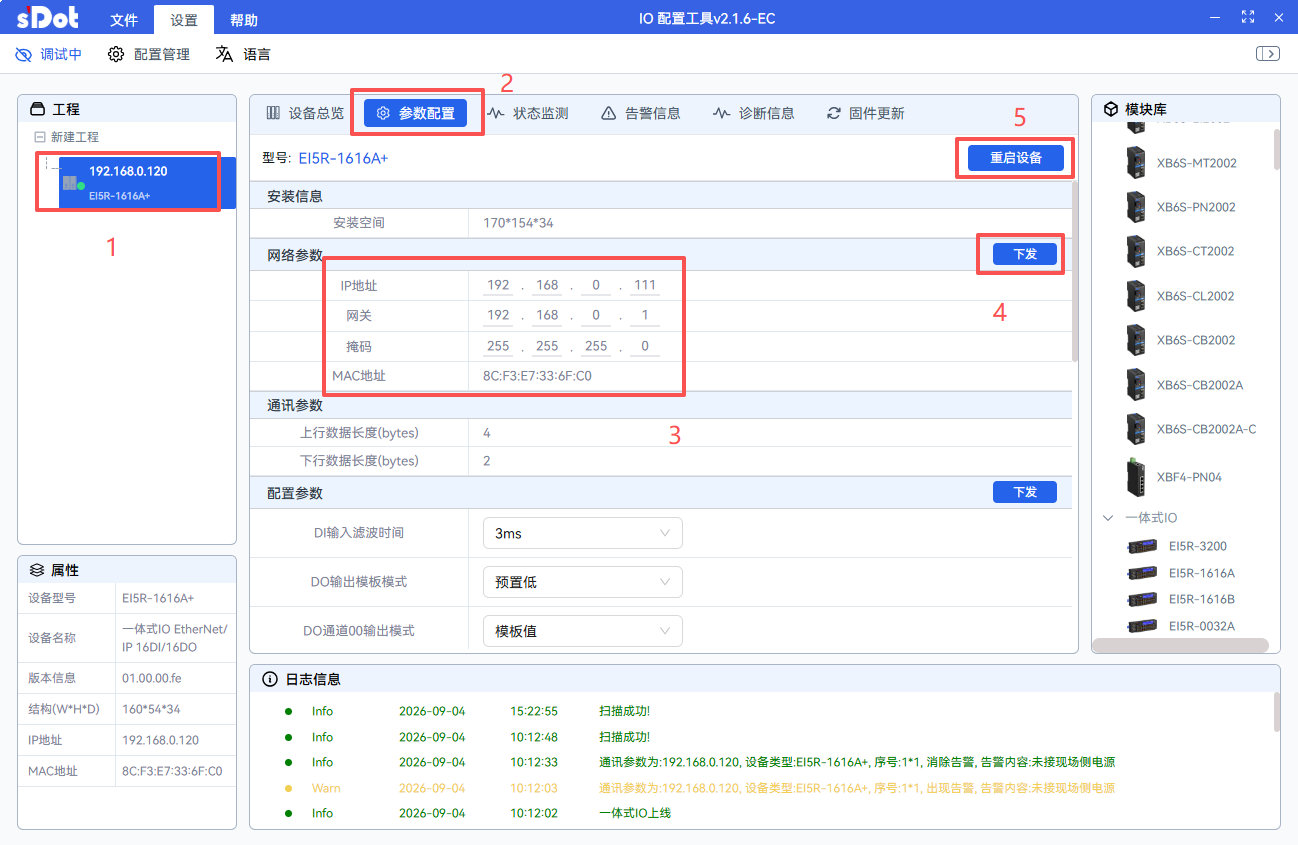
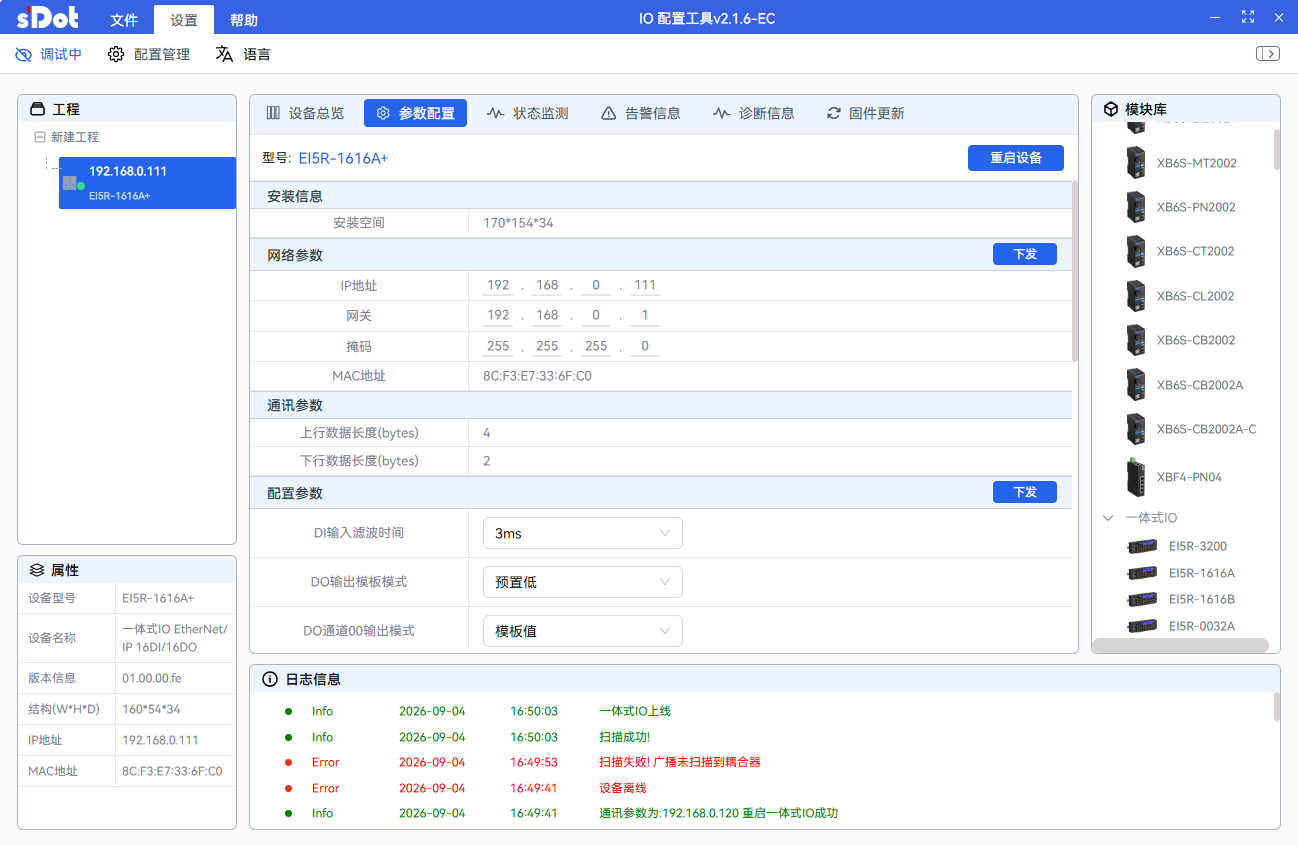
Use the Solidot IO configuration Tool IOConfigToolSetup_2.1.6. Follow the on-screen prompts to select the corresponding network interface Card (NIC) and click scan device. The software automatically lists the EI5R-1616A+ modules in the current network. After entering the debugging module, change the IP address and click Send. Then restart the Coupler for the change to take effect. Close the software and rescan to see the new IP address.
Creating a new project
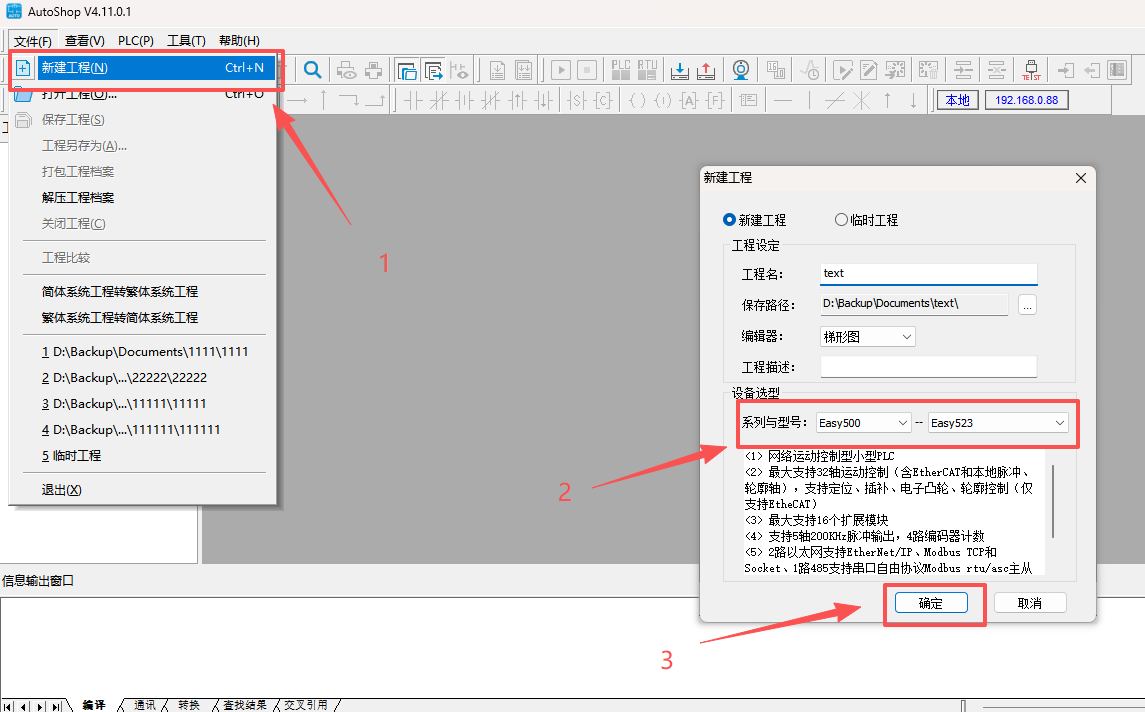
Create a new project in Inovance AutoShop and select the PLC model according to the actual hardware (Easy-523 in this example).
Establishing a PLC communication connection
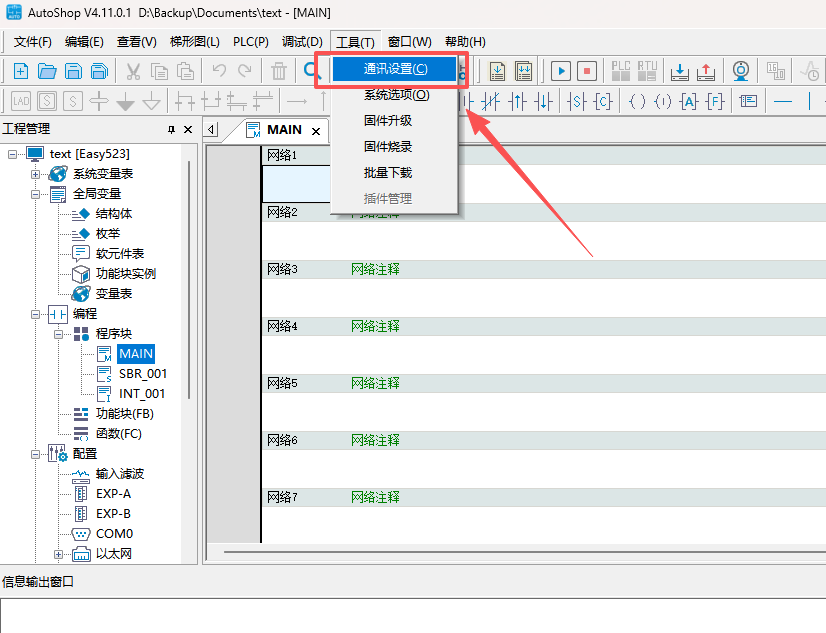
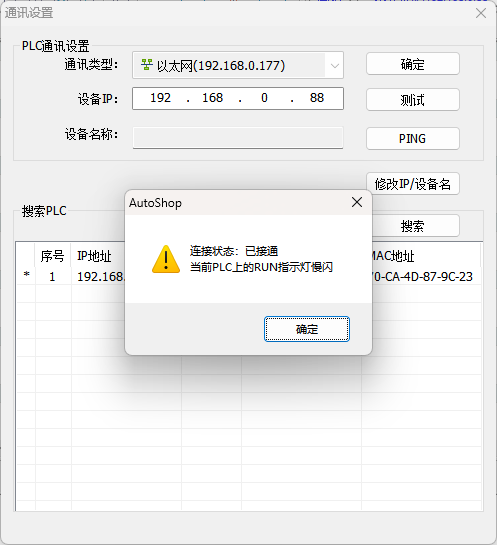
Click "Tools" > "Communication Configuration" in the menu bar and establish a connection with the PLC in the Communication configuration window. Once connected, the PLC can be accessed in AutoShop, ready for the next step of EDS file import and device configuration.
Importing the EI5R EDS file
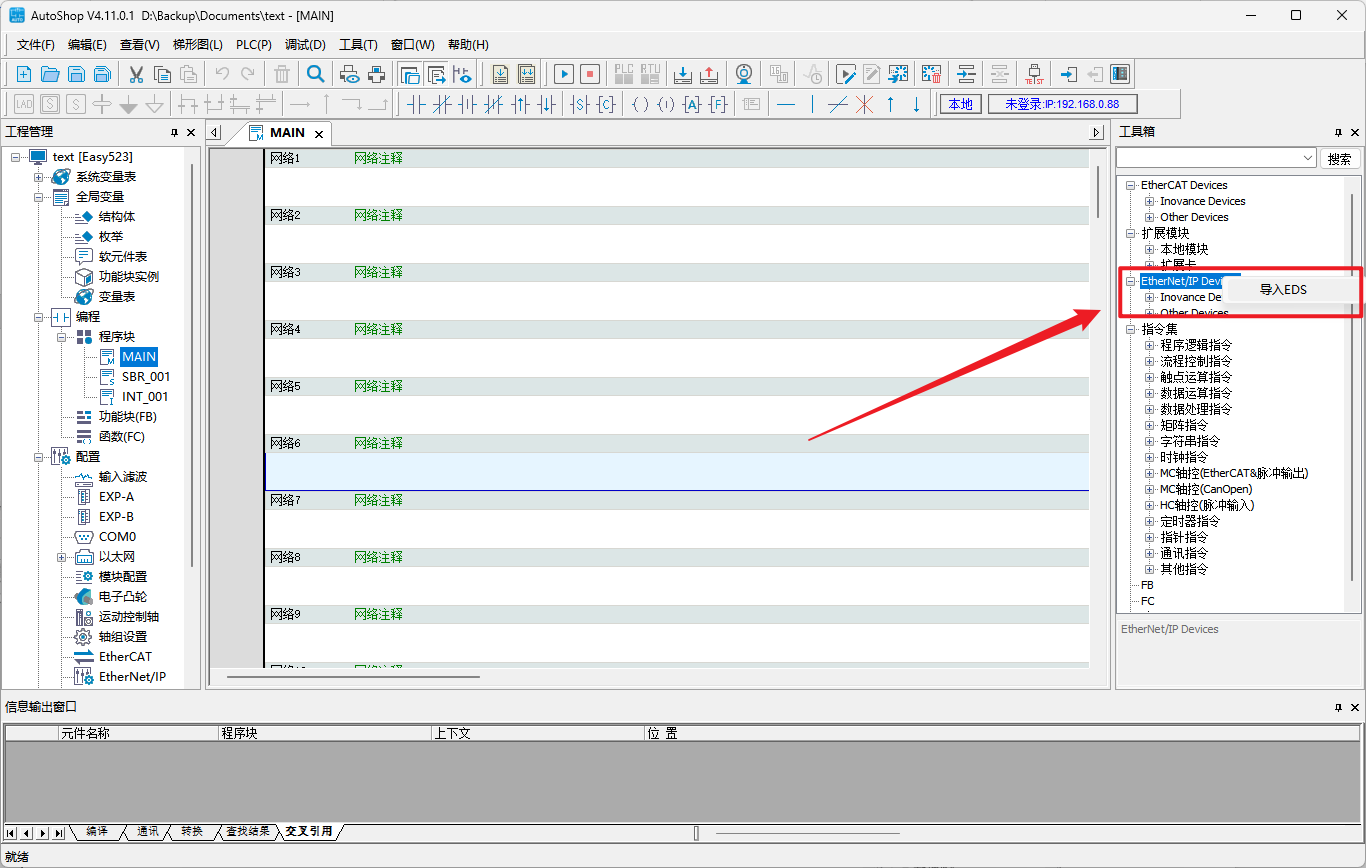
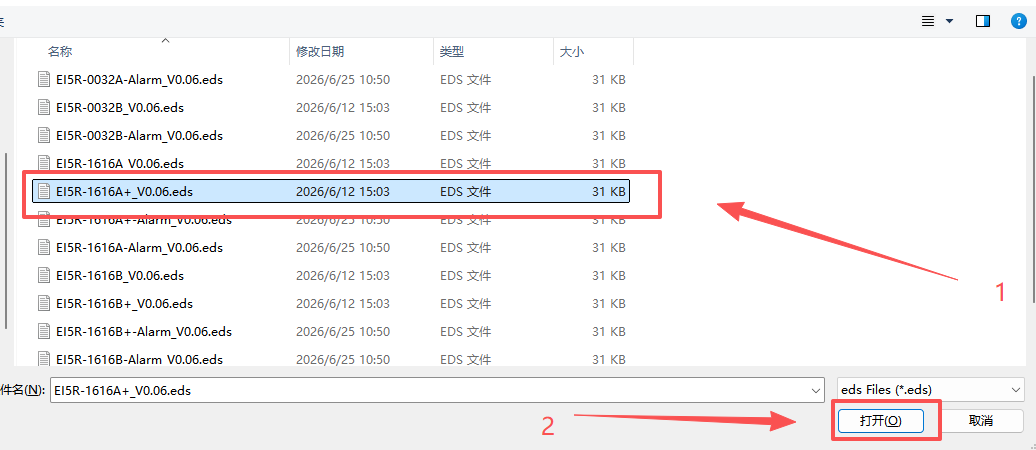
In the toolbox on the right, right-click "EtherNet/IP Devices" and select "Import EDS". In the dialog box that opens, select the path where the EDS file is stored, select the file and click "Open" to complete the EDS file import.
Each EI5R module model has two EDS files: a standard version and an alarm version. Compared with the standard version, the alarm version provides an additional status word in the Upstream data to report module status. This example uses the standard version.
Note: After the EDS file is imported successfully, AutoShop must be restarted manually. Only after the restart can the newly imported device be used for configuration.
Module configuration
1. Automatic scan (recommended)
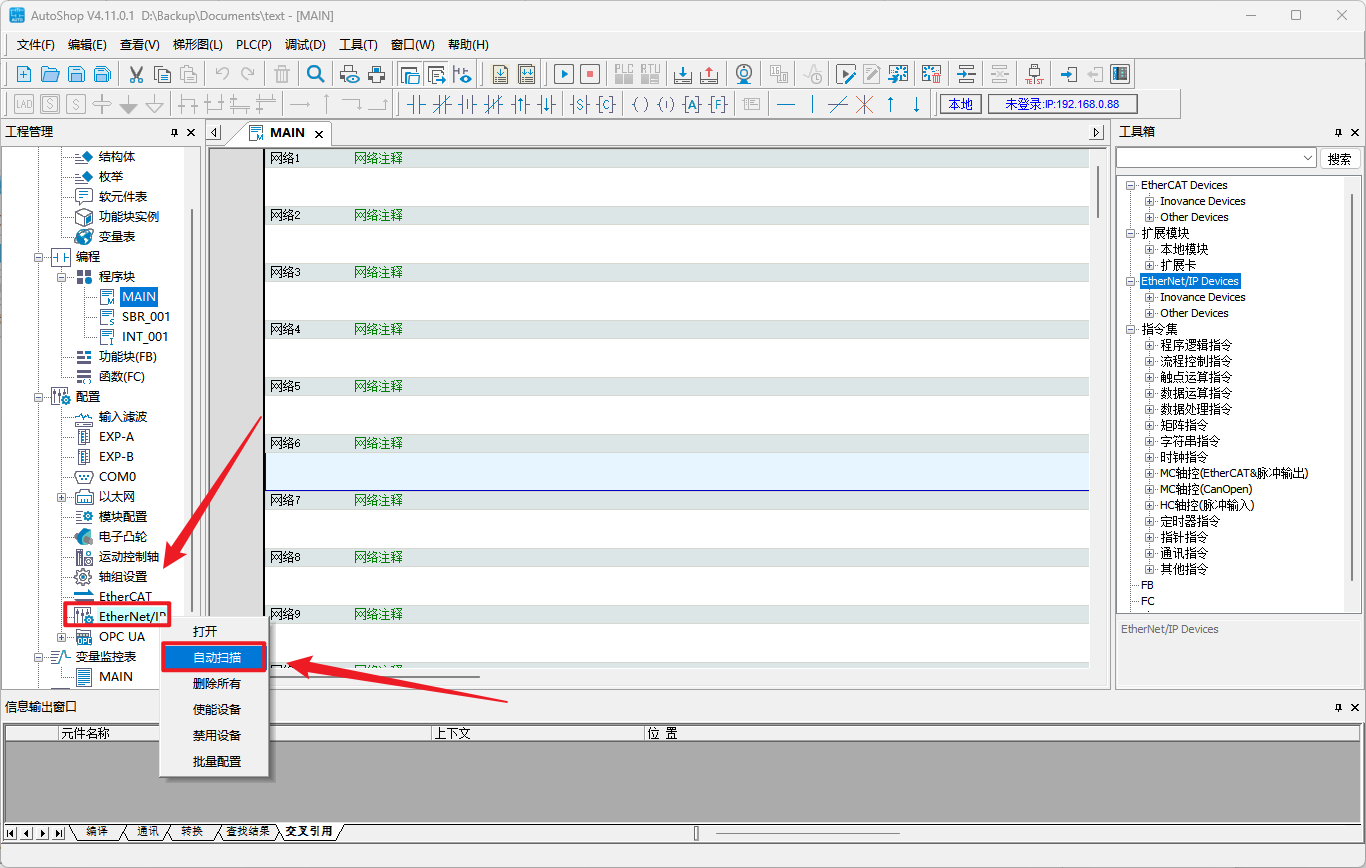
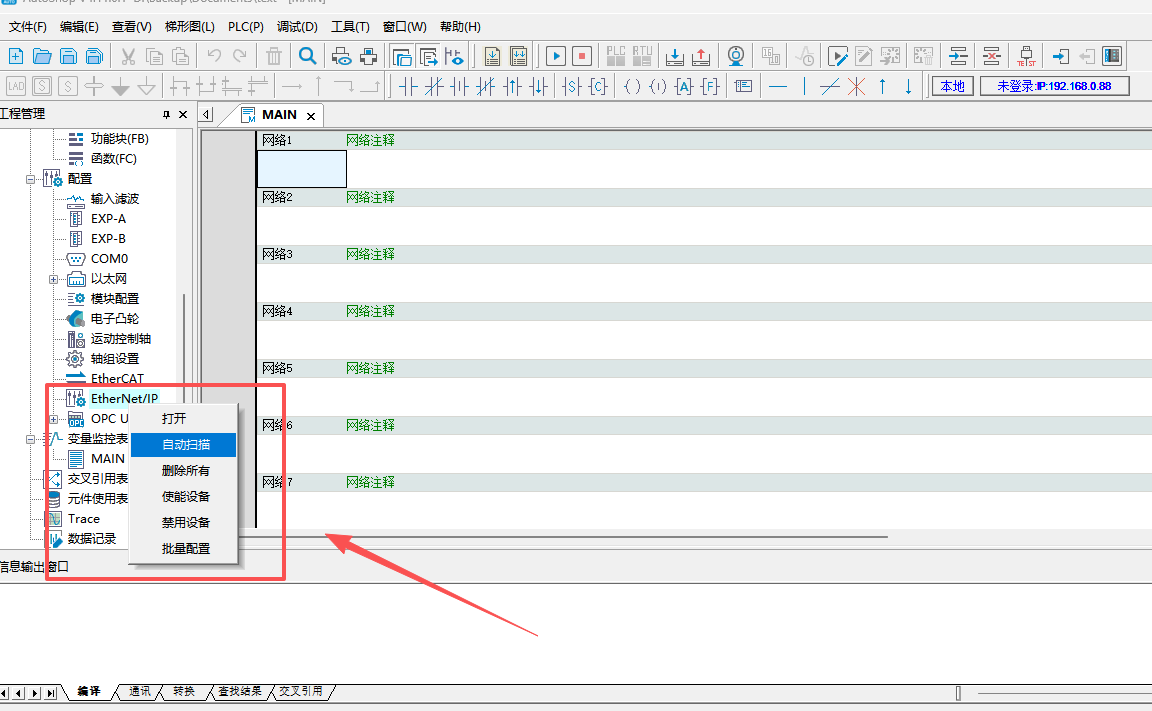
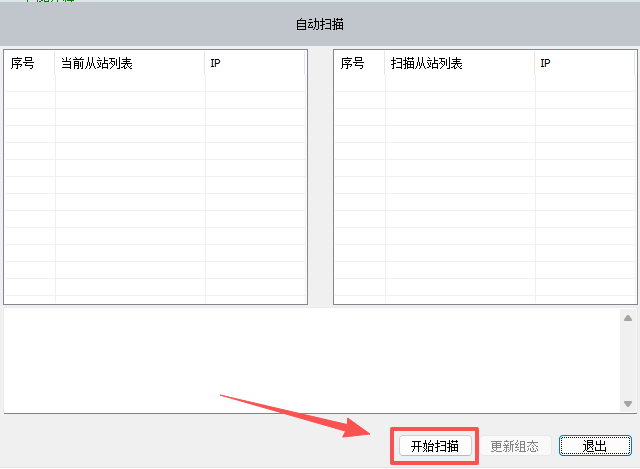
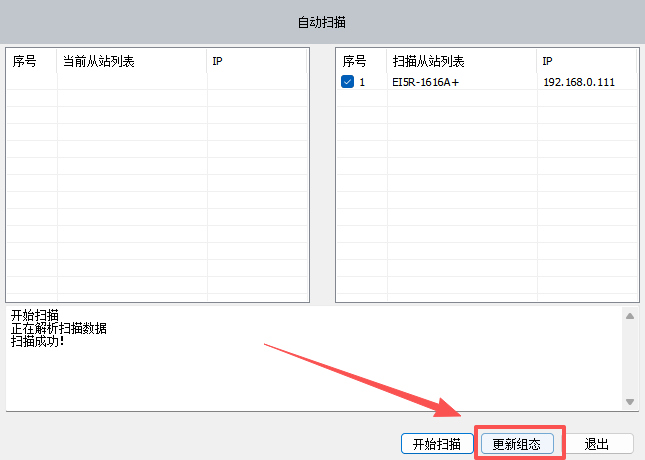
In the "EtherNet/IP Settings" window, right-click the "EtherNet/IP" icon and select "Automatic Scan". In the automatic scan window, click "Start Scan" and click "Yes" when the software prompts for confirmation. After the scan is complete, click "Update Configuration" to configure the modules that are properly connected in the network topology into the software.
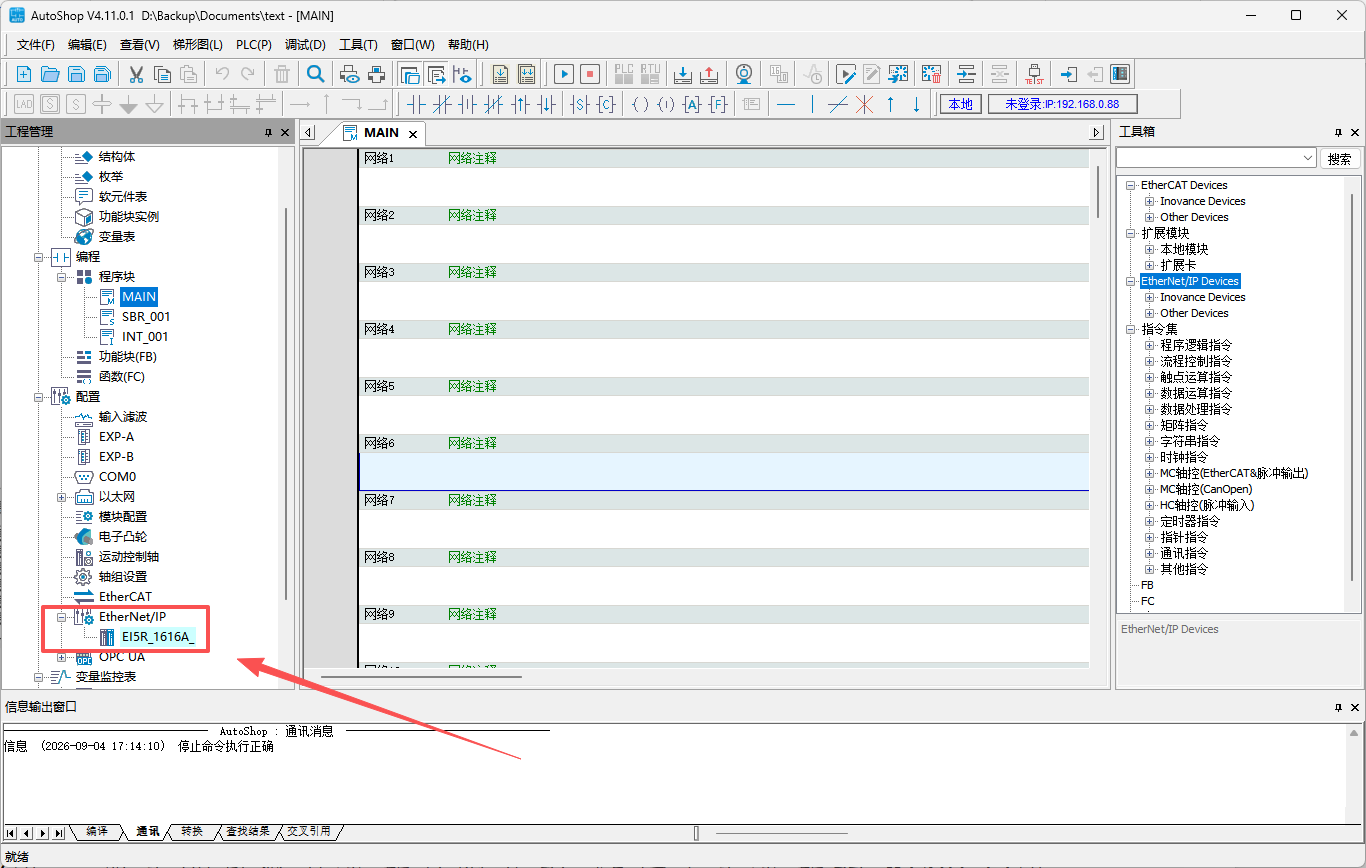
2. Manual Addition of modules
Expand "EtherNet/IP Devices" in the toolbox on the right, find "EI5R-1616A+" and double-click to add it. After adding, change the module IP address in the properties so that it matches the IP set by the physical DIP switch or the host software.
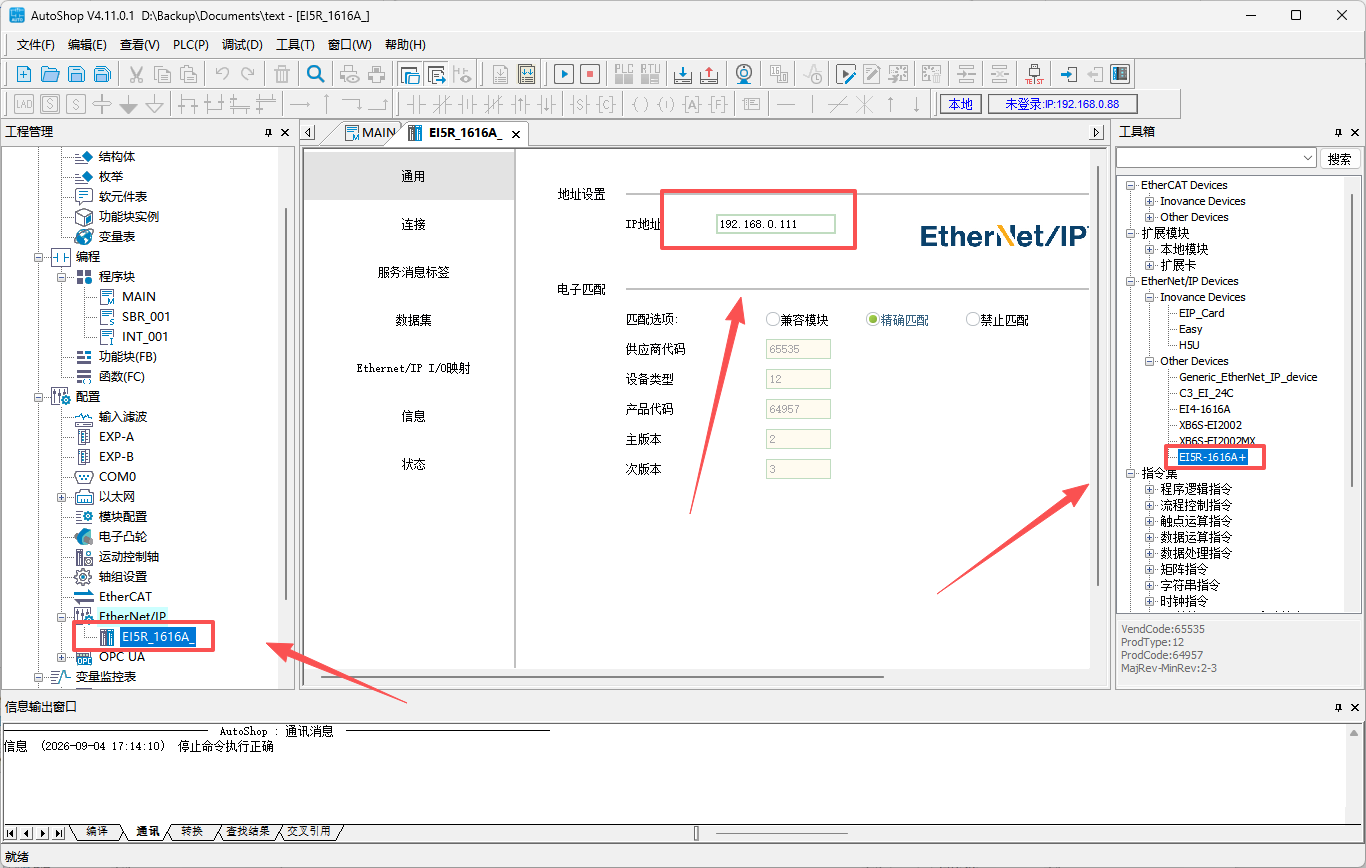
Downloading the configuration
Click "PLC" > "Download" > "OK" and wait for the download to complete. After the download is complete, power-cycle the PLC and the Coupler so that they start with the new configuration and establish communication.
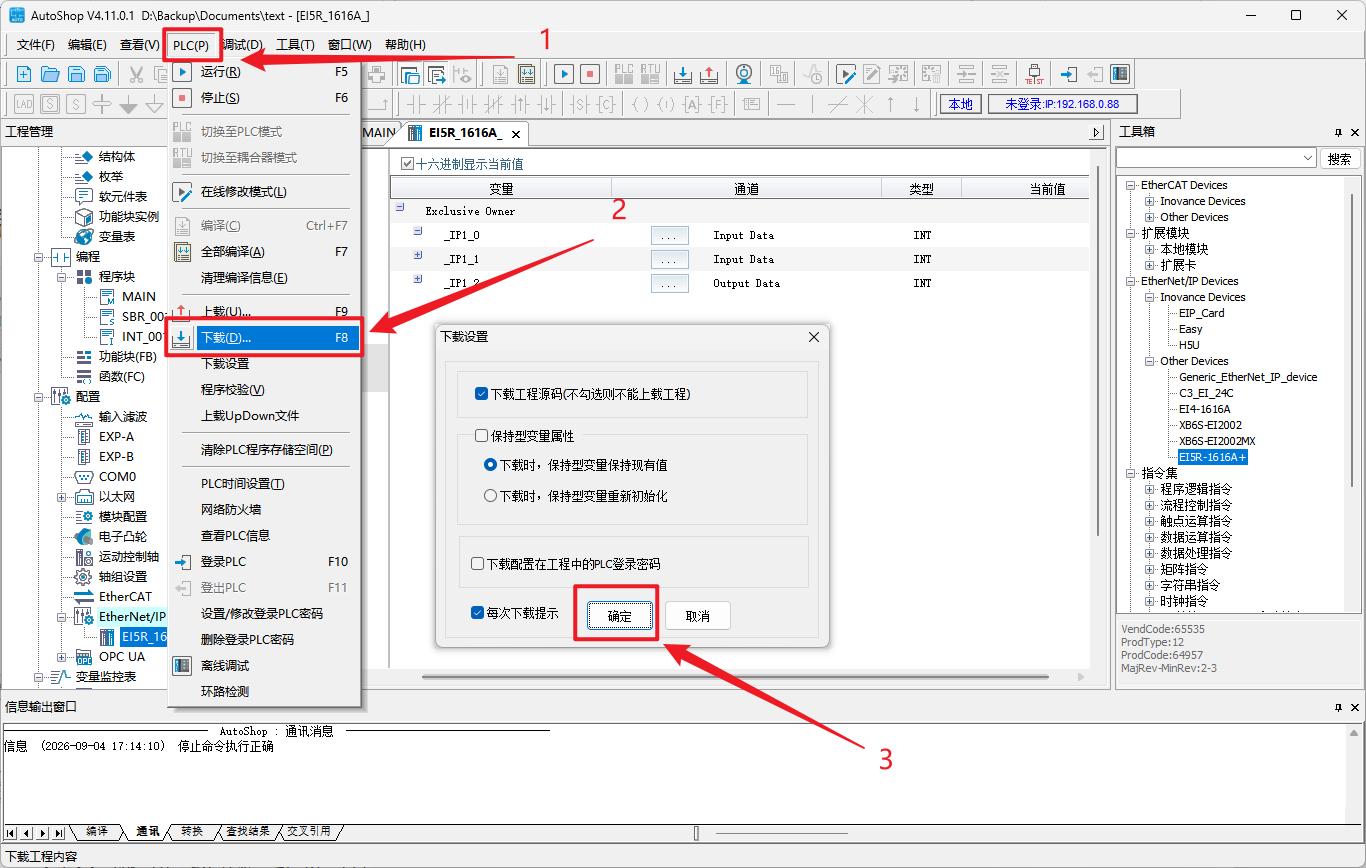
I/O address monitoring and use
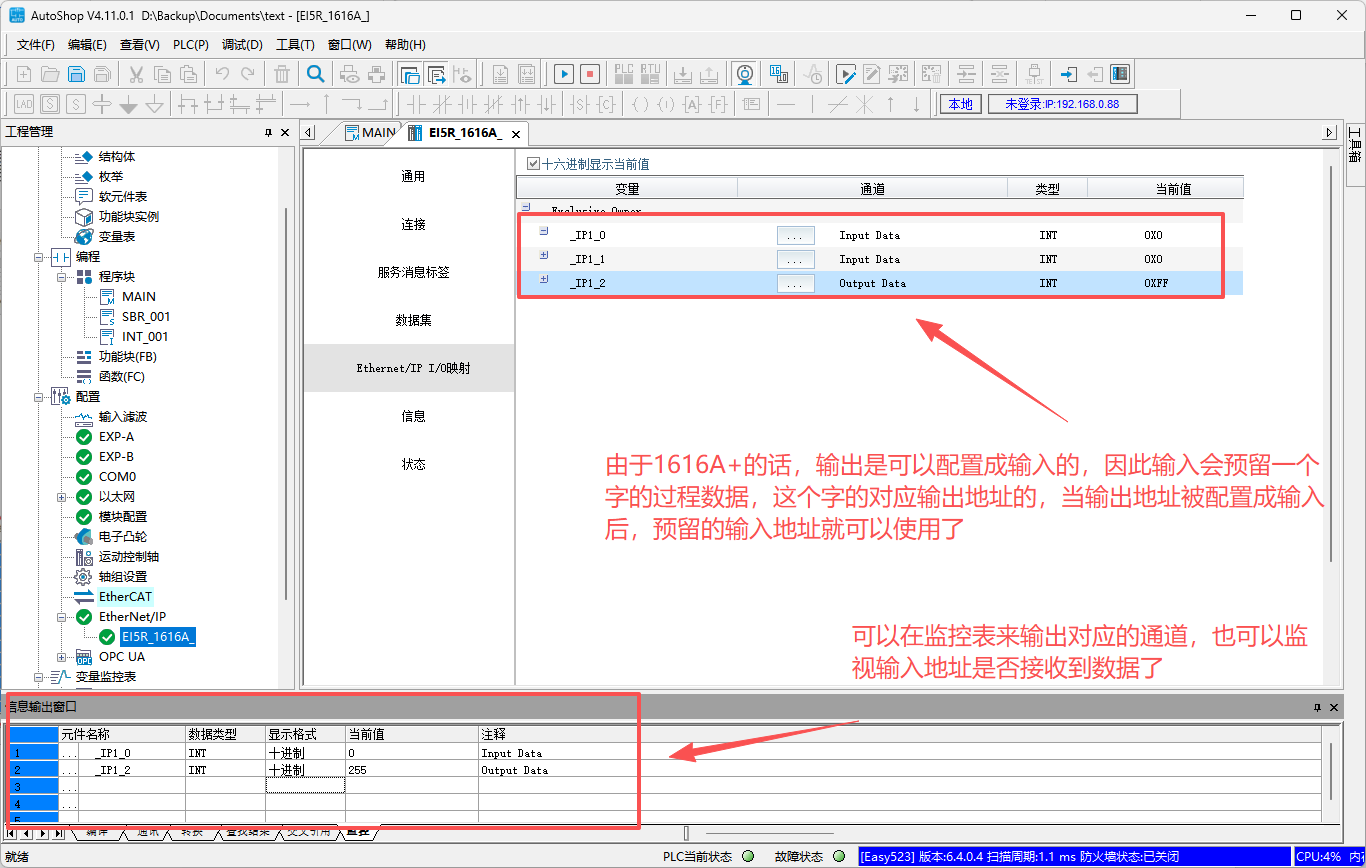
After communication is established, the program can directly read or control through global variables mapped to the corresponding addresses (such as _EIP1_0, _EIP1_1, etc.). In the watch table, the actual status of the input channels and the current values of the output channels can be observed simultaneously, which facilitates on-site debugging and troubleshooting.